
Connecting Greenhouse to Colare
Four phases take you from an unconnected Greenhouse instance to scores landing on candidate profiles. The first two are done once, when your account is set up. The third repeats each time you add the assessment to a job, and the fourth is the day-to-day loop your recruiters run for every candidate.
Connect
Authorize Greenhouse from inside the Colare platform and copy your stage name.
Activate the stage
Send the stage name to Greenhouse Support, who adds the Colare stage to your account.
Add to a job
Drop the Colare stage into a job's interview plan, wherever the assessment belongs.
Send and score
Move candidates into the stage, send the test, read the result without leaving Greenhouse.
What you'll need before you start
- Access to Settings in your Colare account.
- A Greenhouse account that can authorize third-party applications.
- Your Greenhouse subdomain: the first part of the address you sign in on, e.g.
app6forapp6.greenhouse.io. - A way to reach Greenhouse Support for Phase 2. From inside Greenhouse, it's the question mark in the bottom-left corner.
1Connect Greenhouse from inside Colare
Everything in this phase happens inside the Colare platform, apart from a short detour into a Greenhouse authorization tab. At the end of it you'll have a stage name to send to Greenhouse Support.
Open the integrations settings
In the Colare platform, go to Settings → Integrations. The Greenhouse card sits under Applicant Tracking Systems, alongside Ashby and Lever.
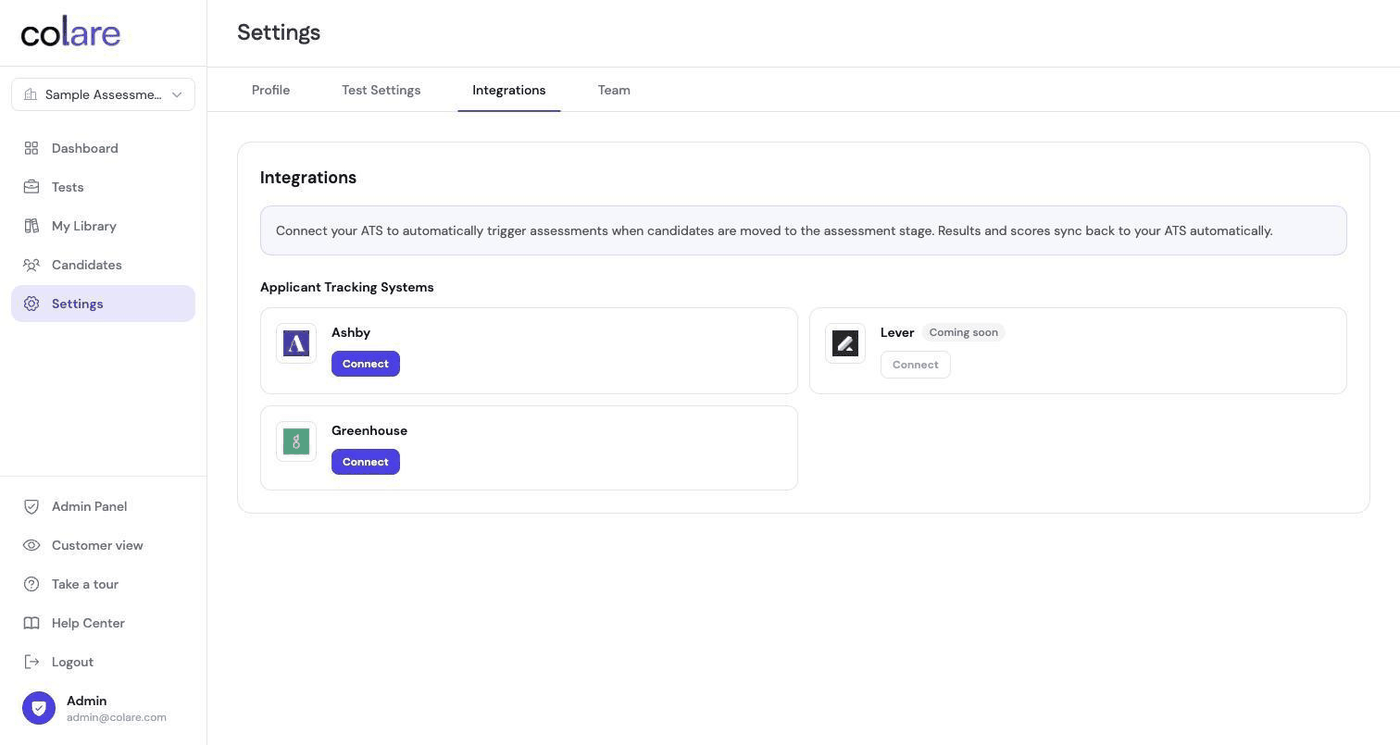
Click Connect on the Greenhouse card
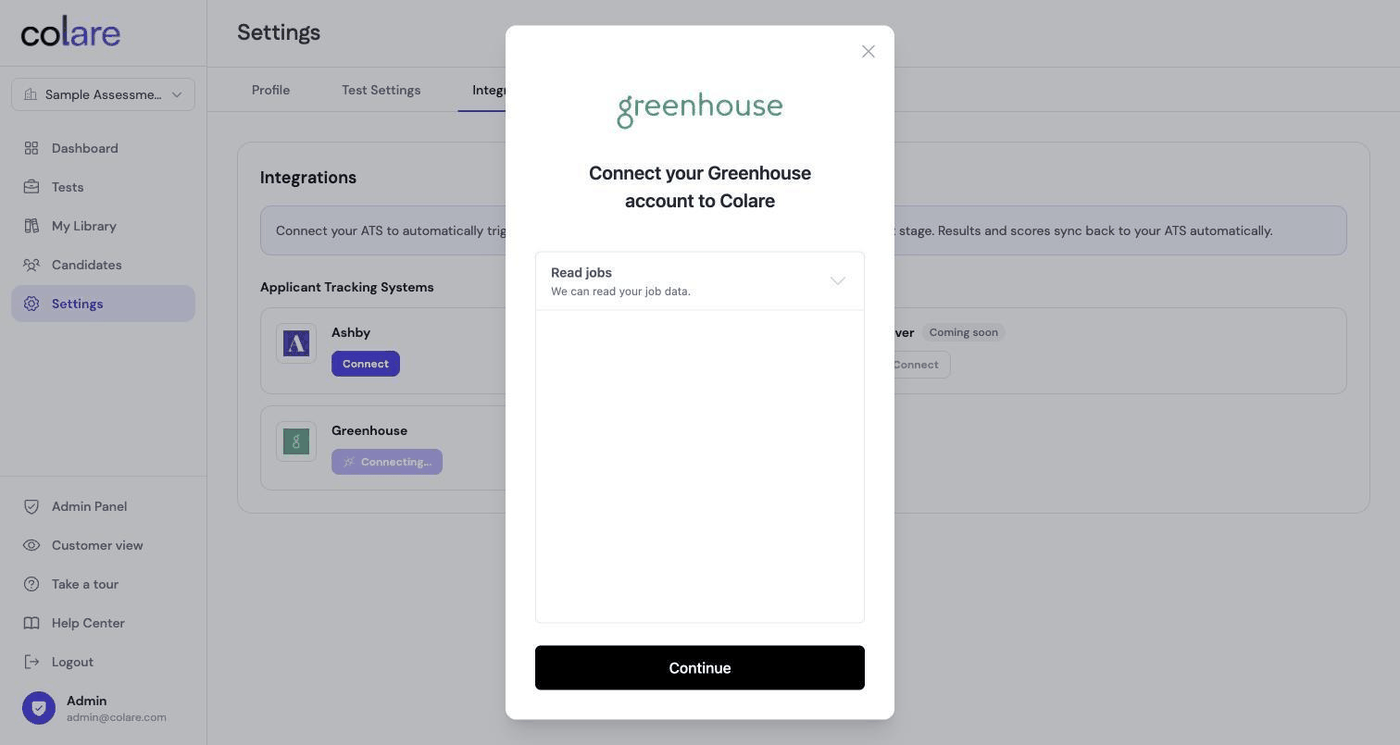
The card switches to Connecting… and a setup box opens over the page.
Review the permissions, then click Continue
The box that opens lists the access Colare is requesting. Read it, then click Continue.
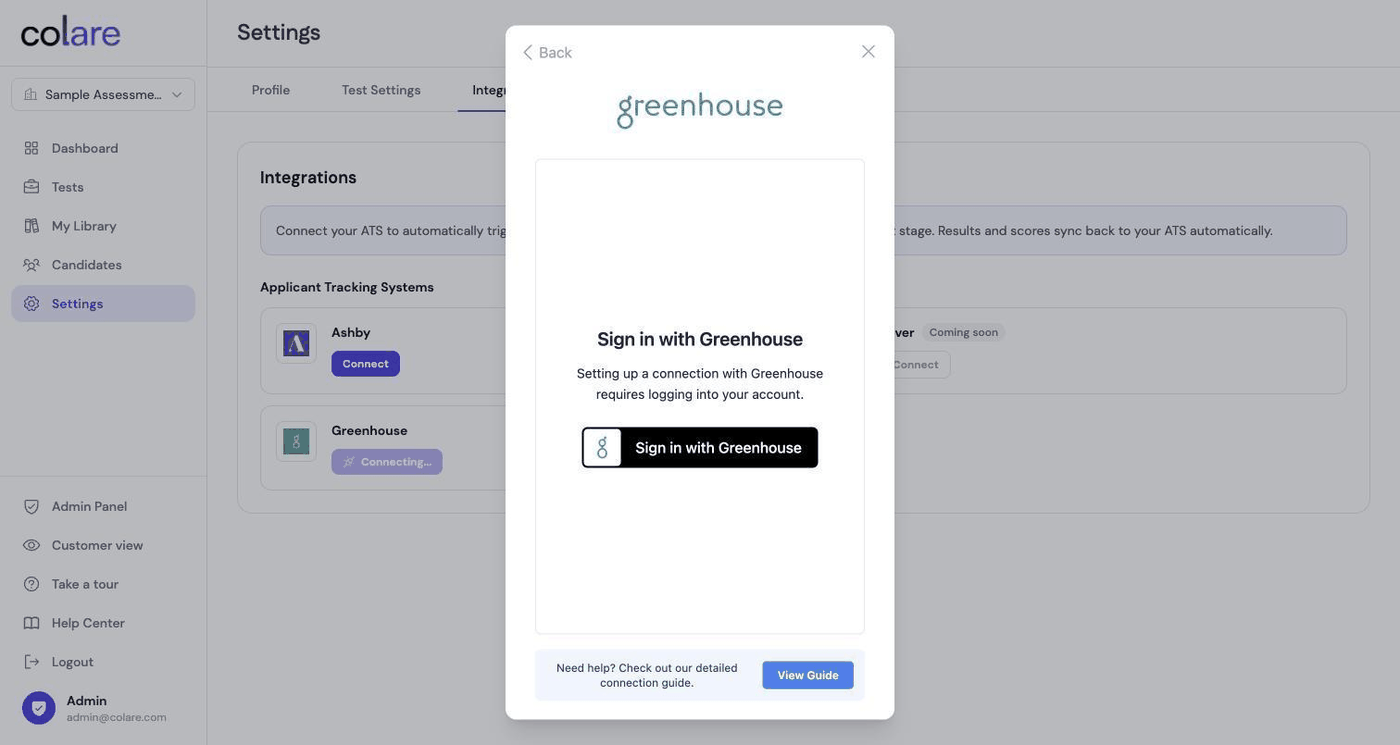
Click “Sign in with Greenhouse”
The Colare widget prompts you to sign in. Clicking the button opens a separate Greenhouse authorization tab. Switch to it to continue.
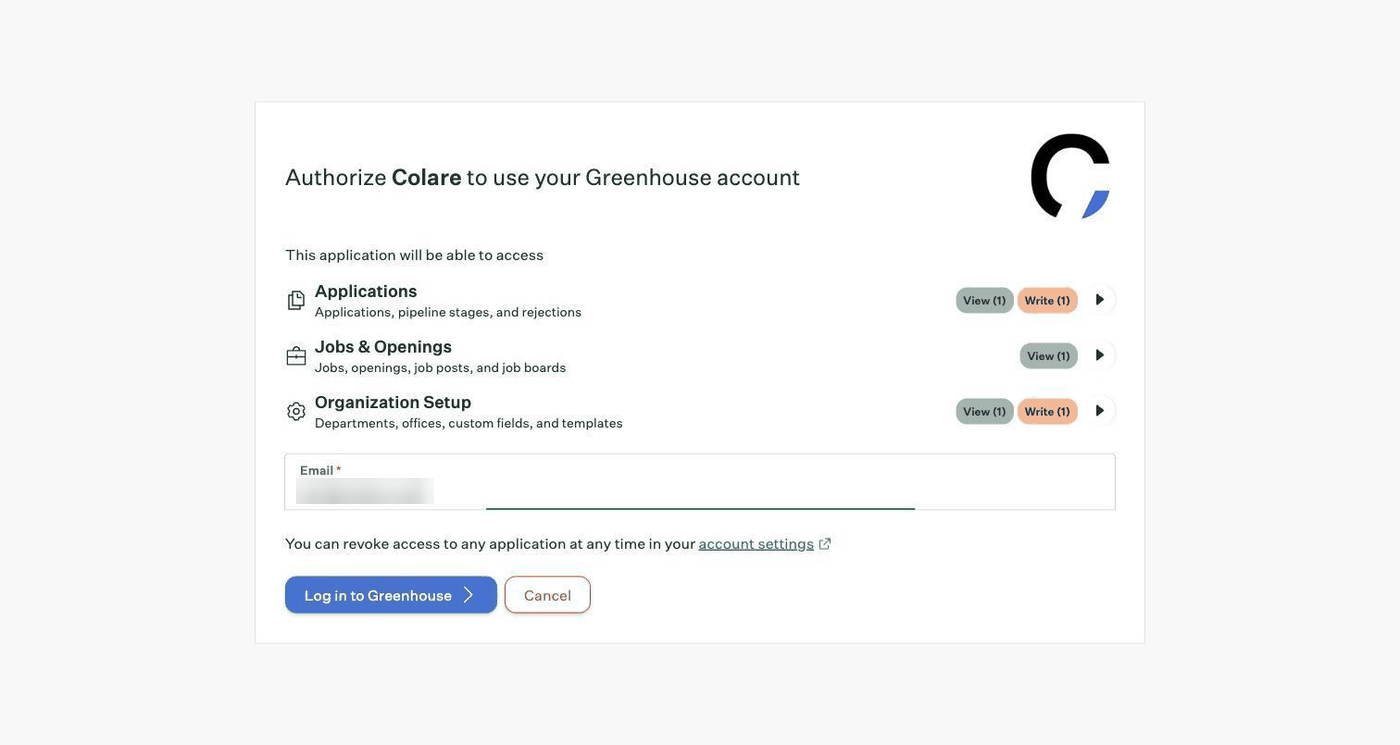
Enter your Greenhouse email and log in
In the new Greenhouse tab, enter the email tied to your Greenhouse account and click Log in to Greenhouse.
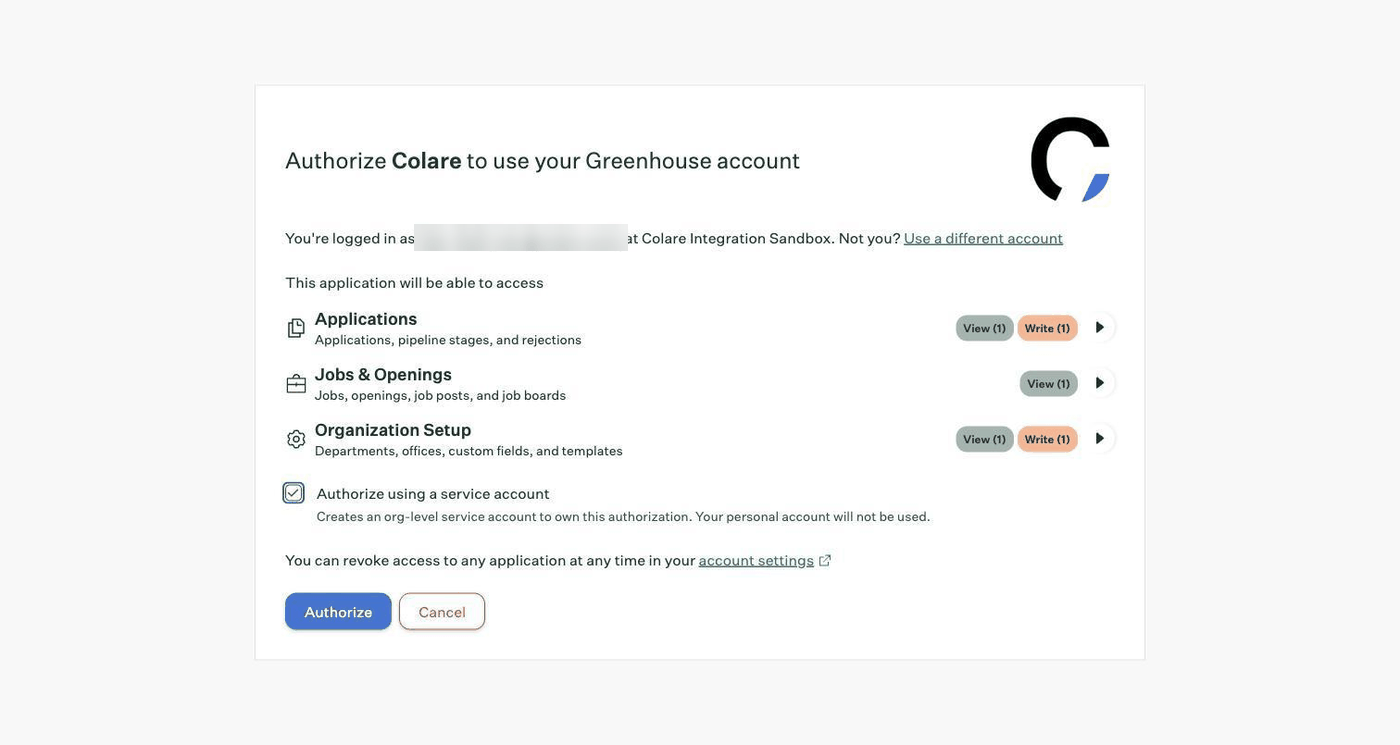
Tick “Authorize using a service account”, then Authorize
Before authorizing, check Authorize using a service account, then click Authorize.
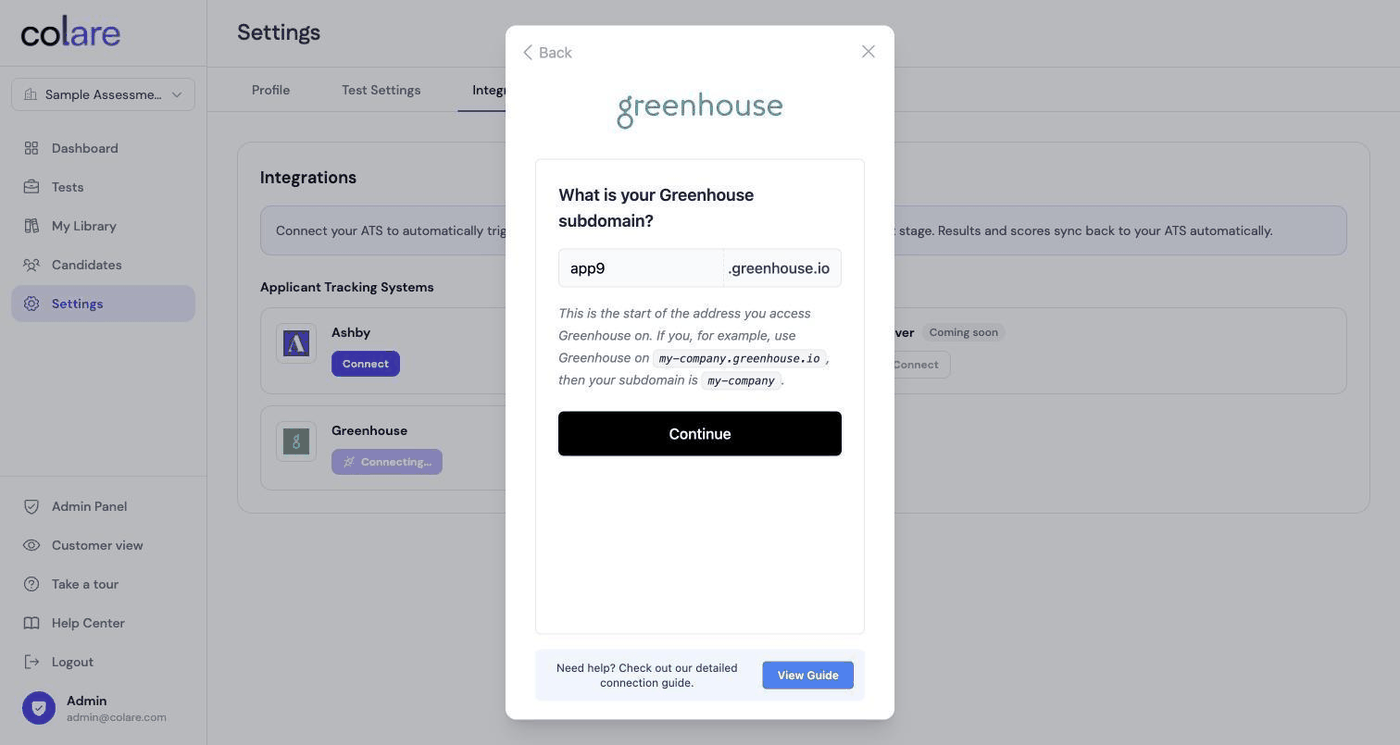
Back in Colare, enter your Greenhouse subdomain
Return to the Colare platform and enter your subdomain, the first part of the address you sign in to Greenhouse on. If you sign in at app6.greenhouse.io, your subdomain is app6. Enter it and click Continue.
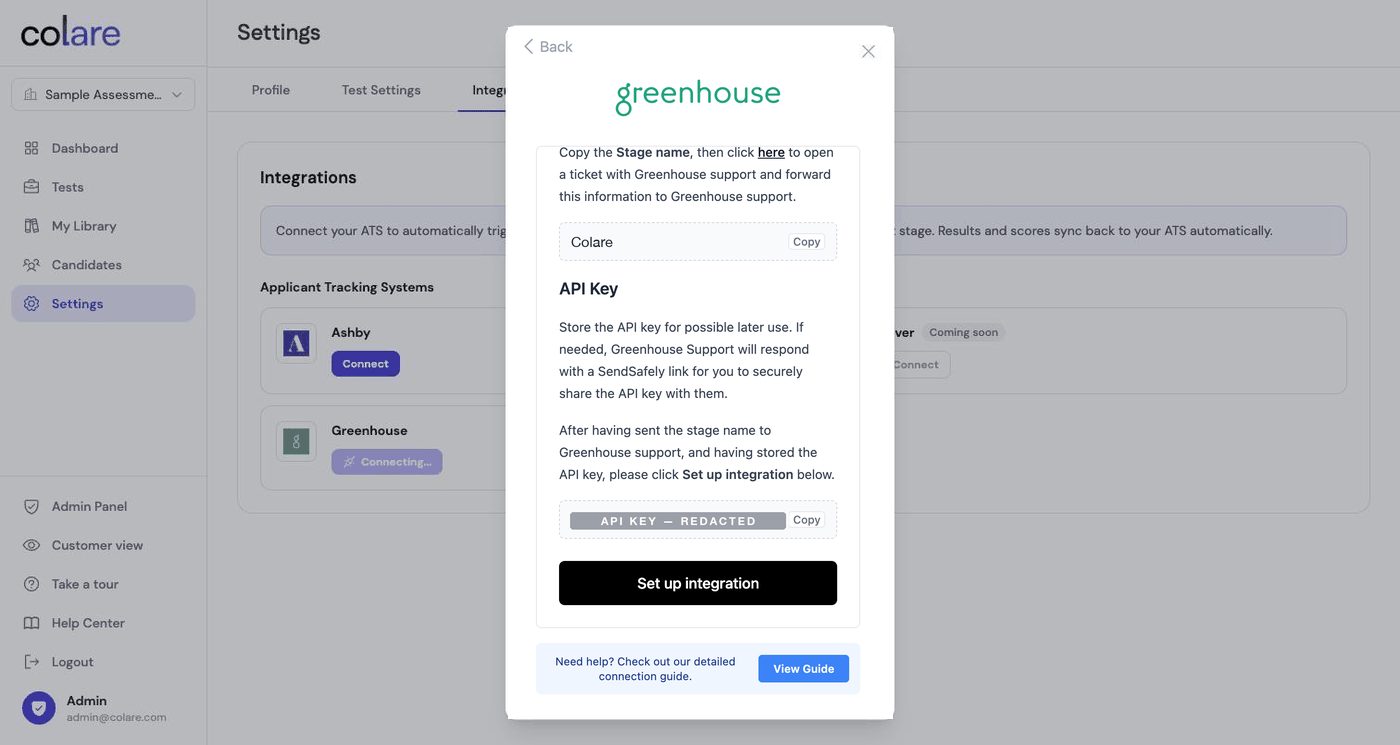
Copy the stage name and store the API key
Colare shows a stage name (usually Colare) and an API key. Copy the stage name for the next step, and store the API key somewhere secure in case Greenhouse Support asks for it later. Keep this box open.
2Finish the setup with Greenhouse Support
Send the stage name to Greenhouse Support, finish the setup in Colare, and Support adds the Colare stage to your account.
Contact Greenhouse Support with the stage name
Click the here link in the setup box to open a ticket with Greenhouse Support. You can also sign in to Greenhouse, click the question mark in the bottom-left corner, and follow the prompts to contact support or submit a ticket. Live chat may also be available while you're signed in. Use the stage name from step 8 and the template below.
Dear Greenhouse support team,

We would like to set up a new assessment integration for our Greenhouse account. Could you please create a stage with the following name:

    - Stage name: [stage name from step 8]

Thanks, and let us know if you need anything else!

Best,
[your name]
Back in Colare, click “Set up integration”
Once you've sent the request and stored the API key, return to the setup box and click Set up integration. You don't have to wait for Support to reply. Colare shows a short configuration screen with the setup it still needs.
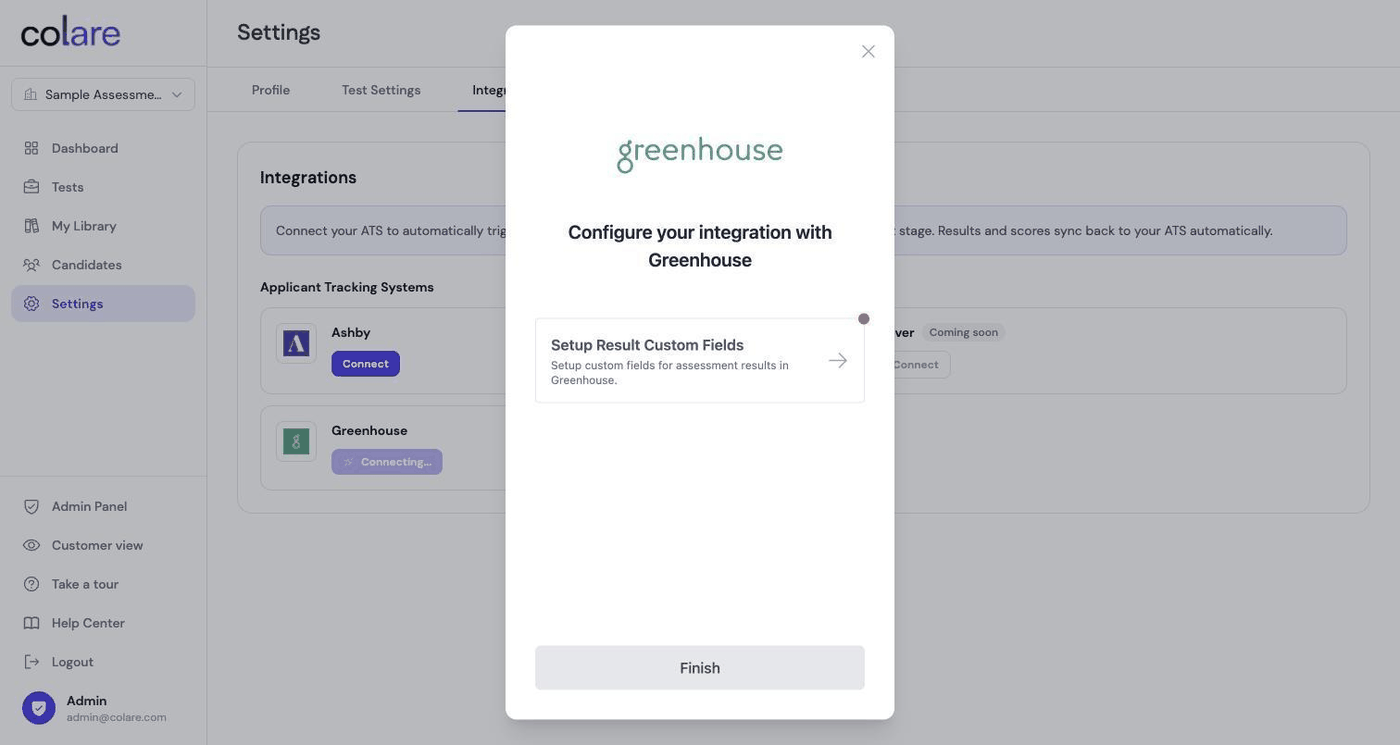
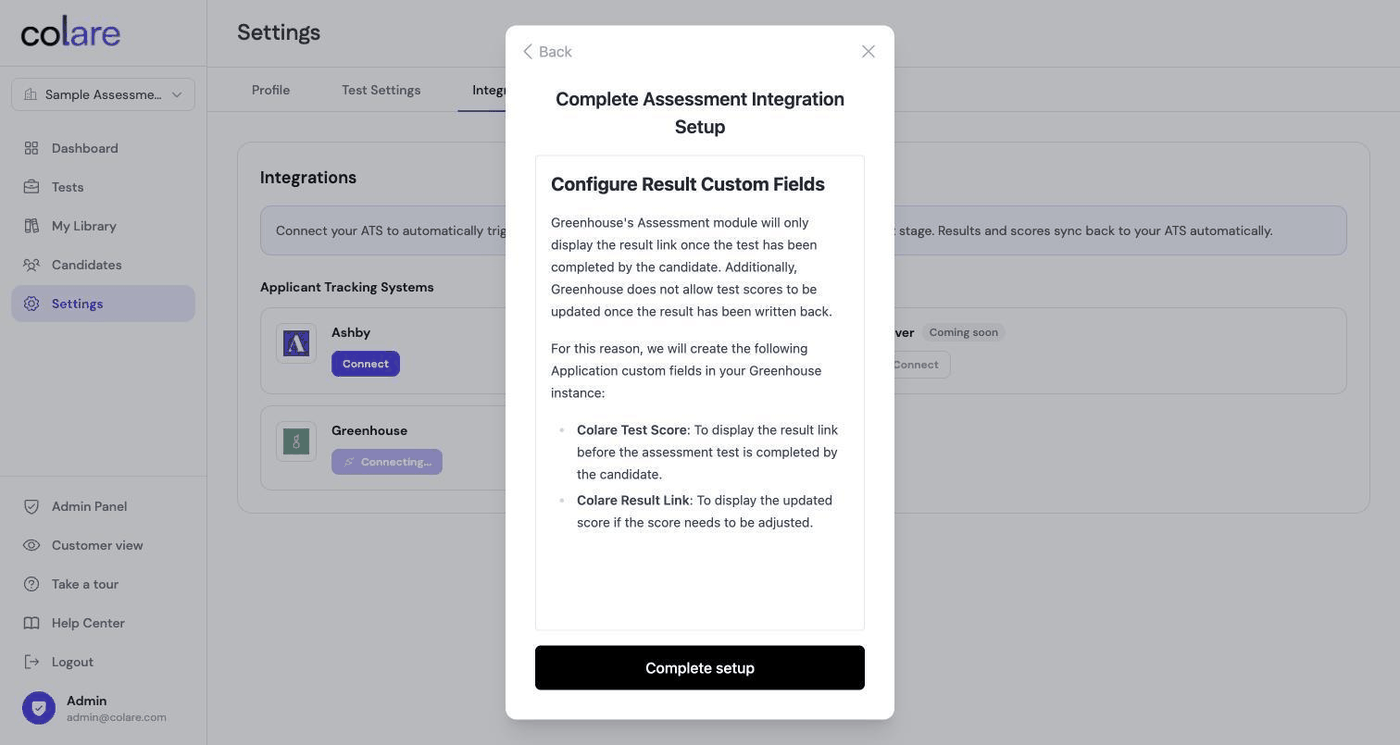
Set up the result custom fields, then complete setup
Click Setup Result Custom Fields. Colare lists the two Application custom fields it will create in your Greenhouse instance. Click Complete setup to add them.
Share the API key if Support asks
If Support asks for the API key, share it through the secure link they send. Once they've added the stage, Colare appears in the stage library when you edit a job's interview plan.
3Add the stage to a job
Add the Colare stage to any job you'd like to use the assessment on, including jobs that are already open. Candidates already in the pipeline can be moved into it whenever you're ready.
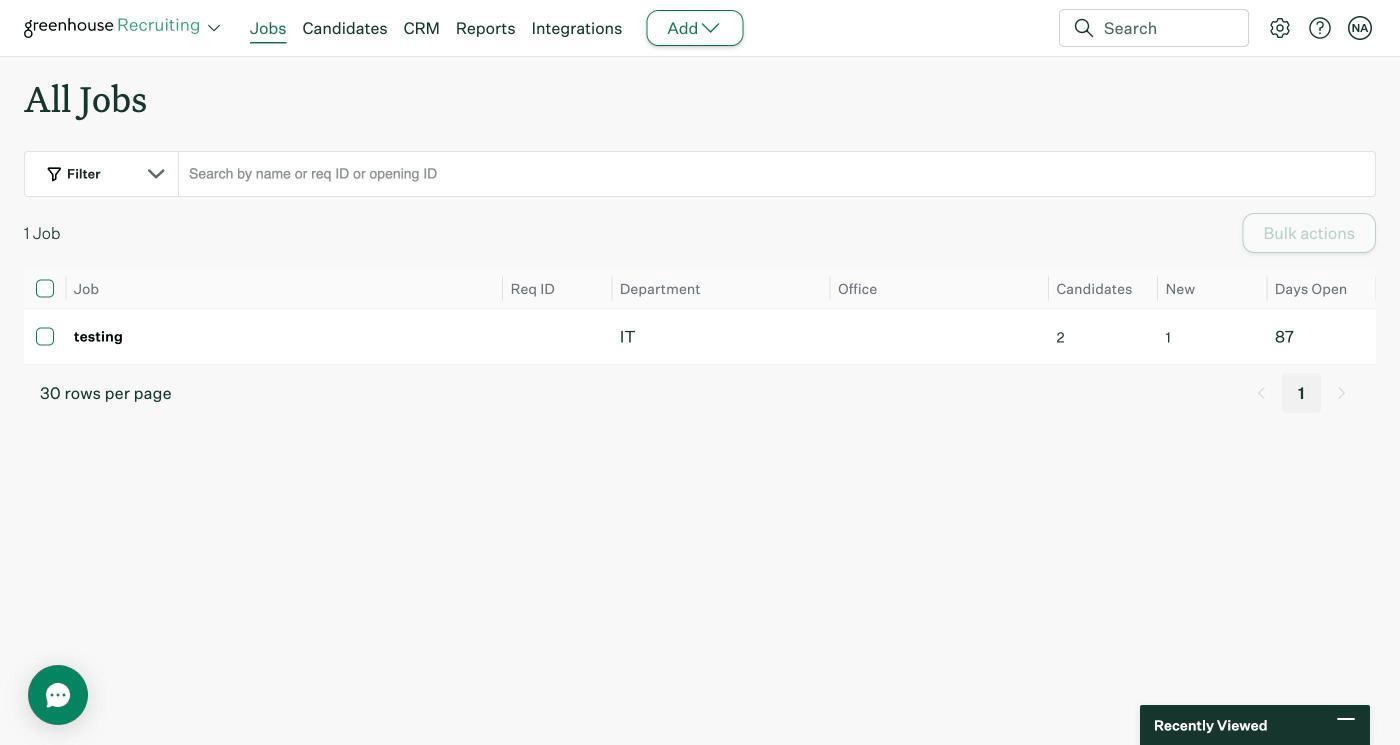
Open the job in Greenhouse
Click Jobs in the top navigation, then select the job from the list.
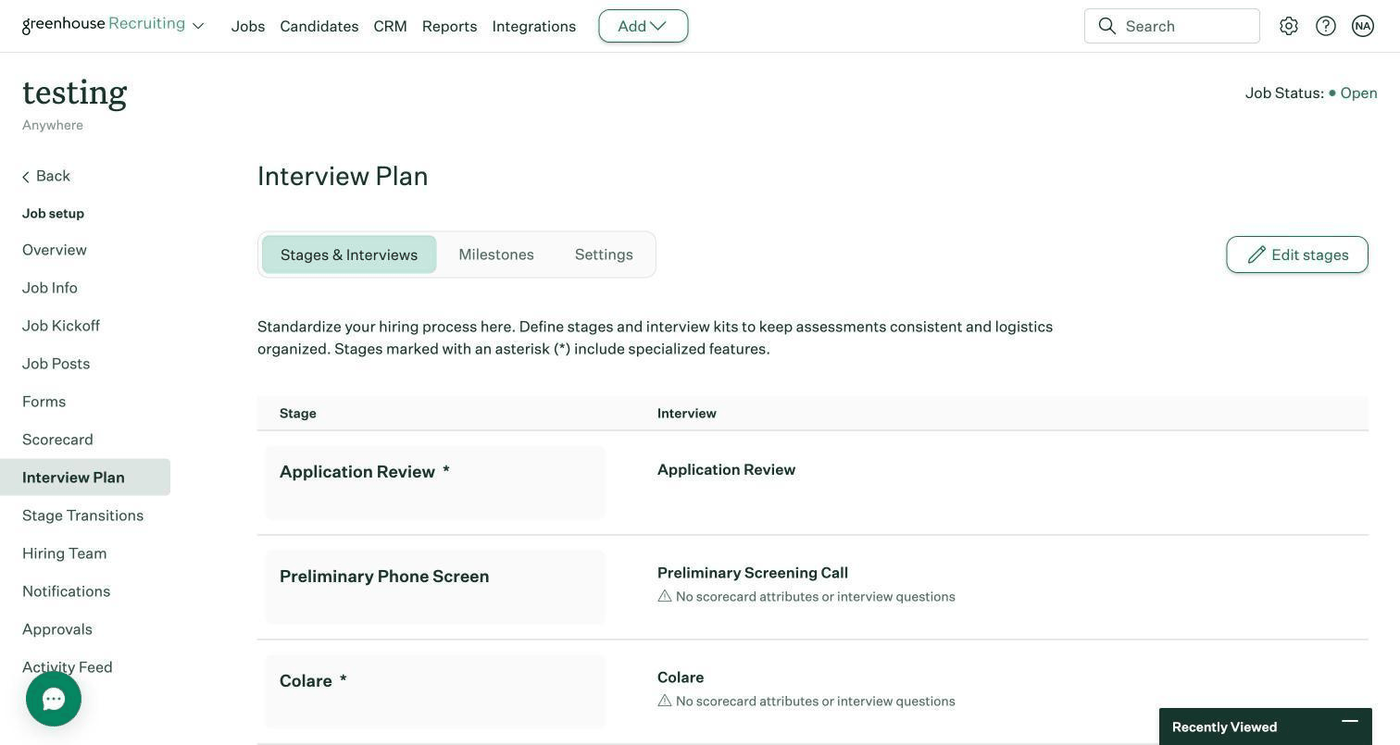
Open the job's interview plan
Go to Job Setup → Interview Plan to see every stage in the plan.
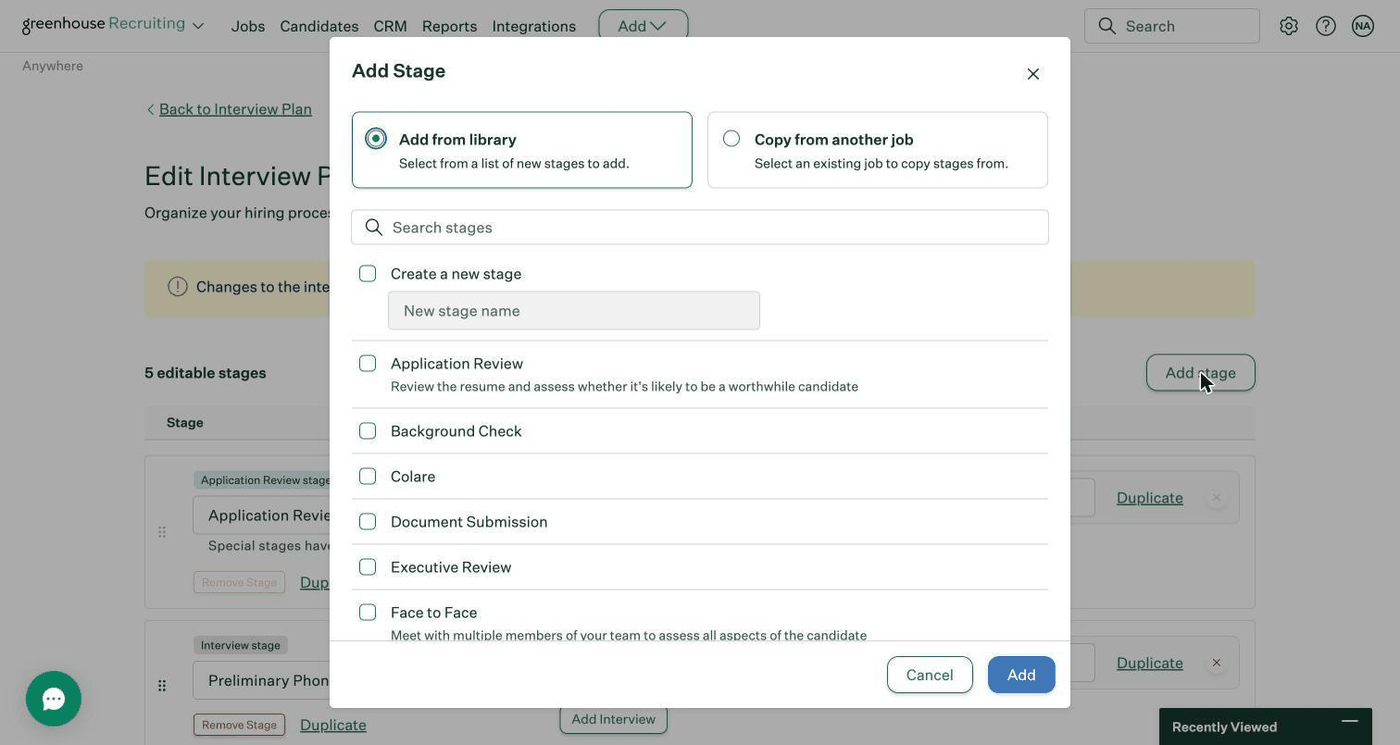
Add the Colare stage
Click Edit stages, then Add stage. Tick Colare in the library list and click Add.
Place the stage wherever the assessment belongs in your hiring process. One Colare stage covers every assessment: you pick which test to send from the candidate's profile (step 19).
4Send assessments and read scores
The day-to-day loop. Everything here happens inside Greenhouse. There's no need to open Colare to send a test or read a result.
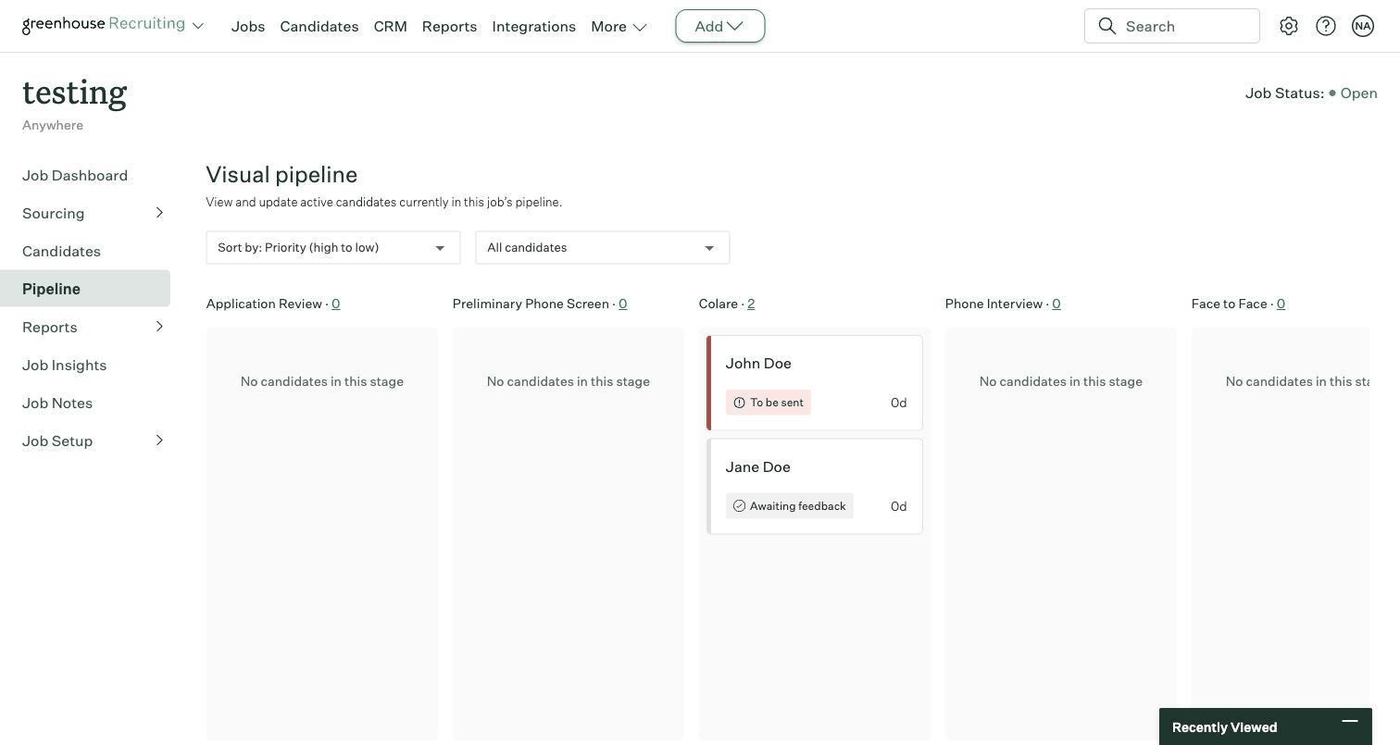
Open the job's pipeline
Click Pipeline in the job's left-hand menu. The Colare column shows every candidate currently sitting in the assessment stage.
Move a candidate into the Colare stage
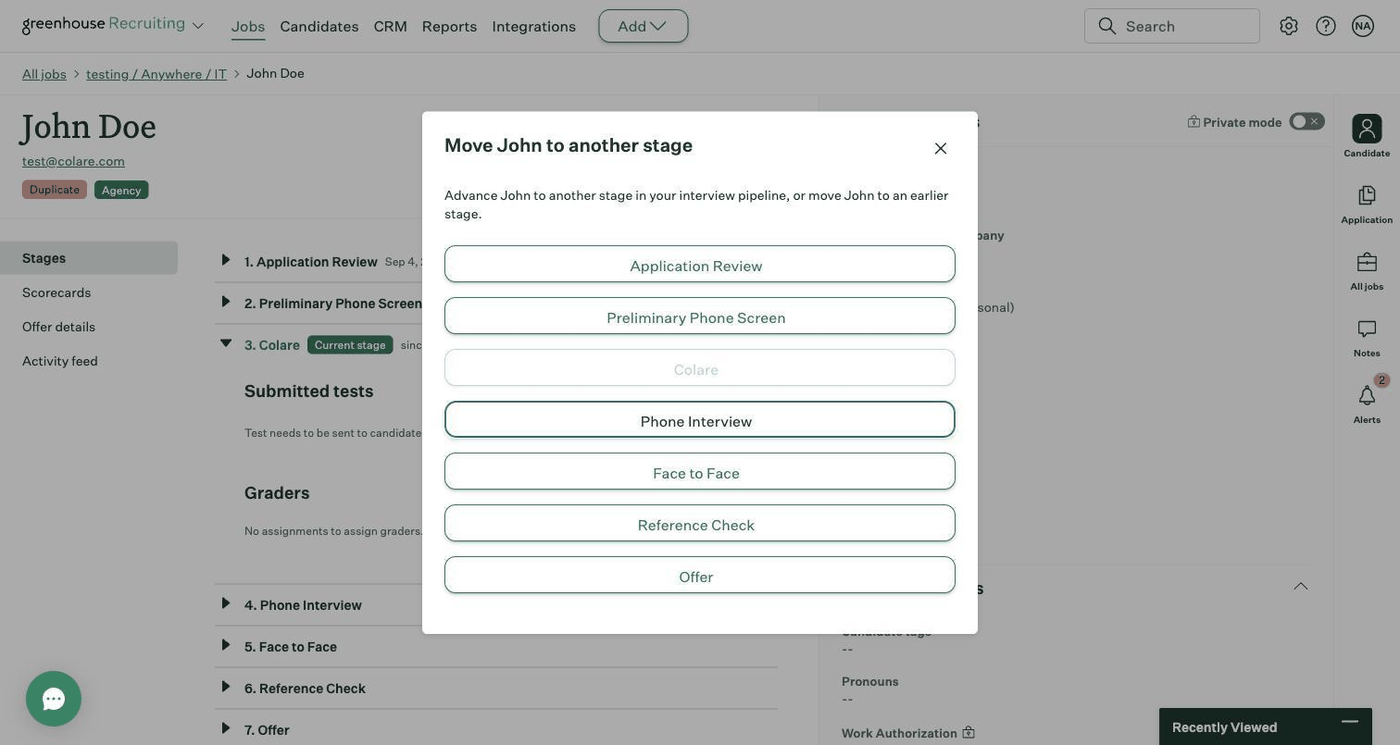
Open the candidate and click Move stage, or drag their card across in the visual pipeline.
Open the candidate and send the test
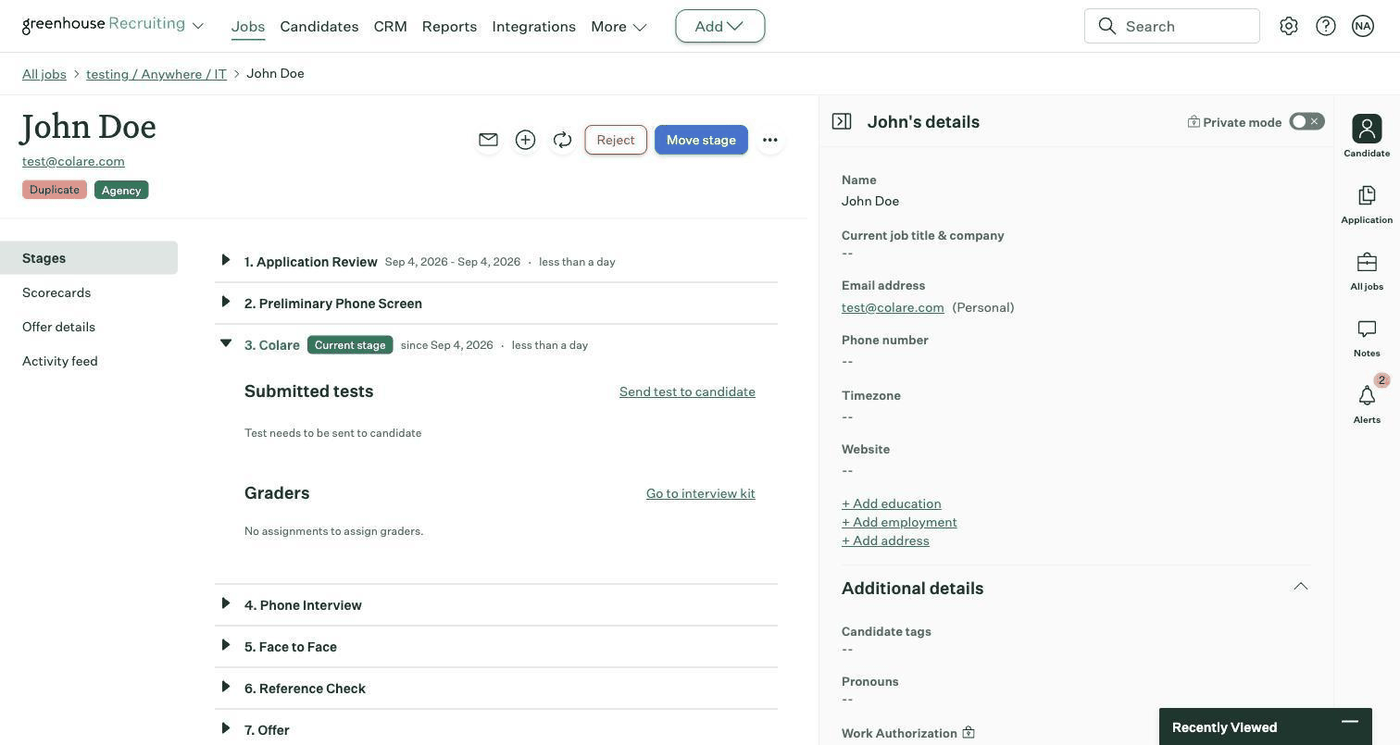
Click the candidate to open their profile. Under the Colare stage, click Send test to candidate.
Pick the test, the reviewer, and when to send
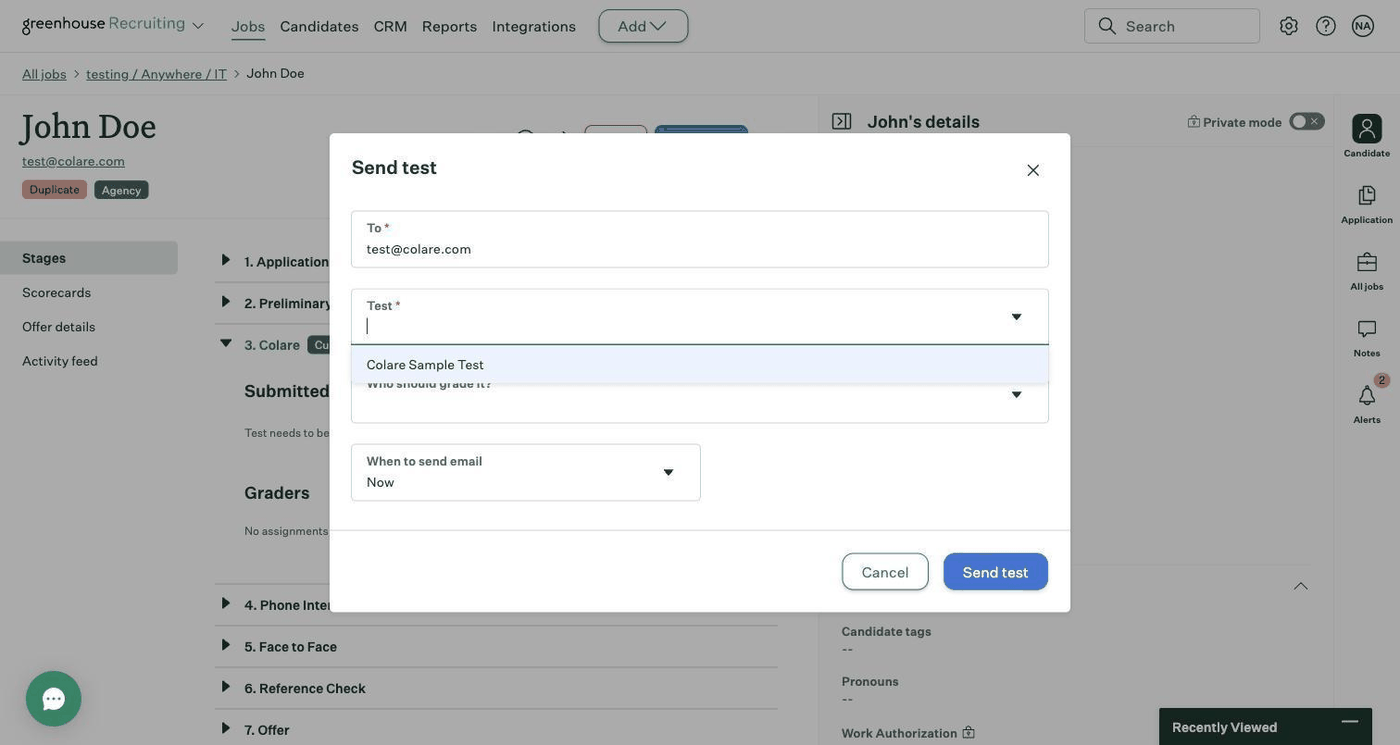
Choose the test from the list, pick the teammate in Greenhouse who should be notified when the result comes back (Greenhouse labels this field "Grader"), choose when the email goes out, then click Send test.
Send to several candidates at once
Open the job's Candidates list, click Bulk Actions, tick the candidates you want, and use Edit Selected. That sends the assessment in one action instead of one at a time.
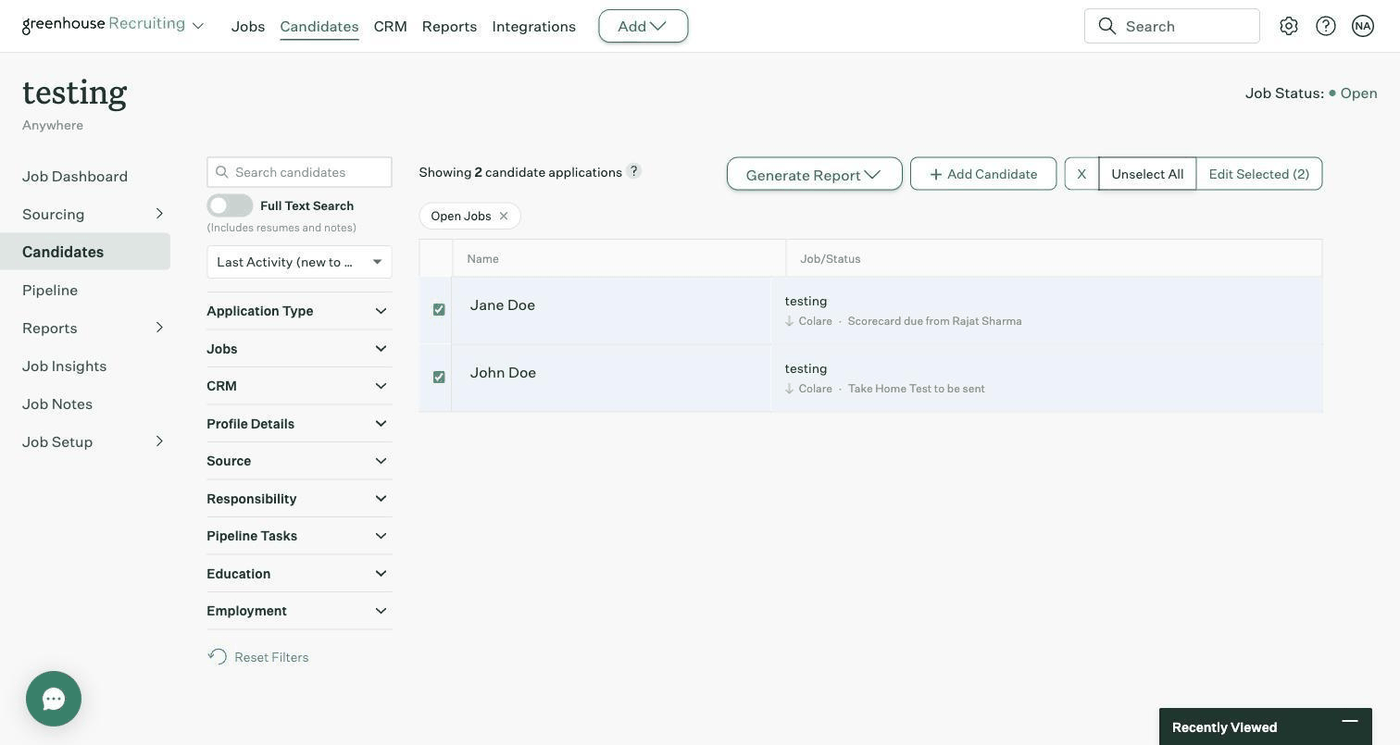
Read the result without leaving Greenhouse
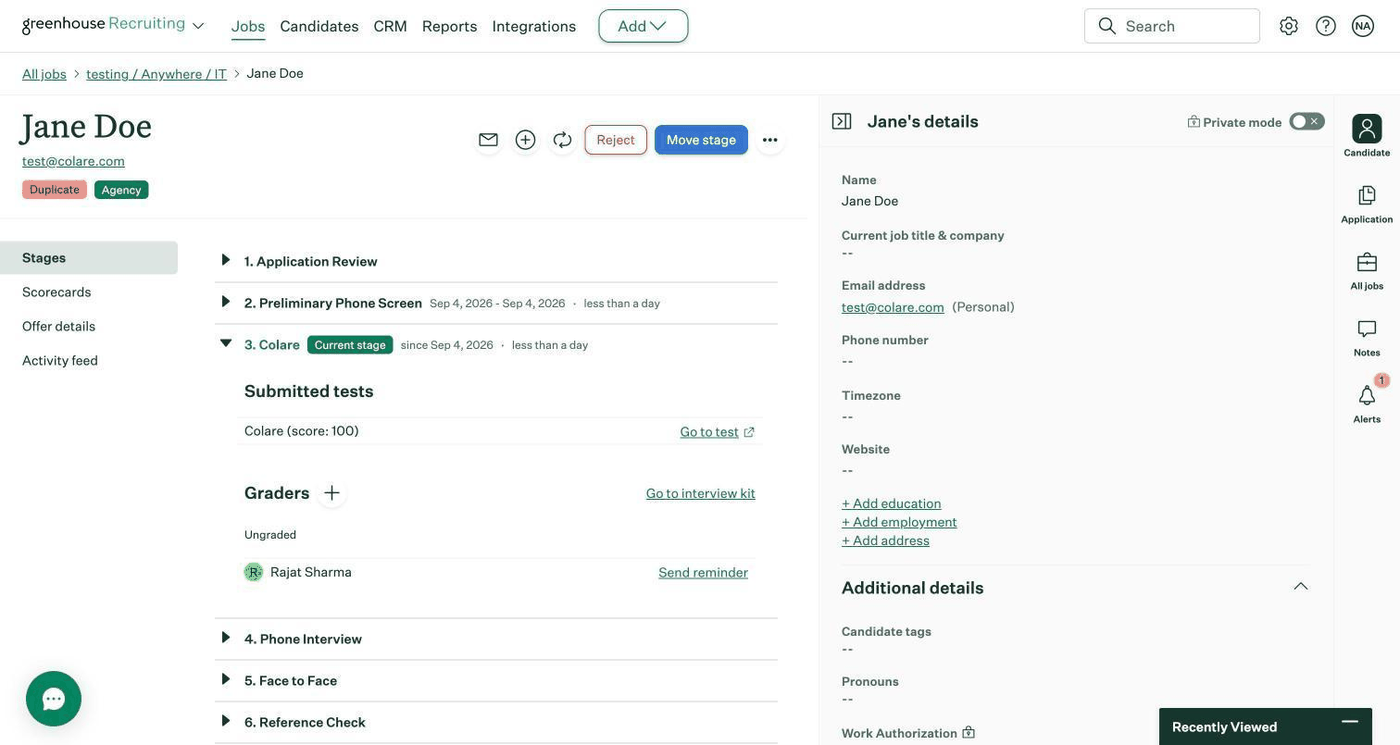
Once the candidate finishes and the assessment is scored, the score appears under Submitted tests on their profile, and Go to test opens the full Colare report.
Phases 1 and 2 are done once. After that, you add the stage to new jobs and send tests to candidates, all inside Greenhouse.