
Connecting Ashby to Colare
Three phases take you from an unconnected Ashby instance to scores landing on candidate profiles. The first is done once, by an Ashby admin. The second repeats each time you add the assessment to a job, and the third is the day-to-day loop your recruiters run for every candidate.
Connect
Swap two API keys between Colare and Ashby to open the connection.
Add to a job
Add Colare as an activity on the interview-plan stage where the assessment belongs.
Send and score
Send the assessment and read the score on the candidate's page, without leaving Ashby.
What you'll need before you start
- Access to Settings in your Colare account.
- An Organizational Admin in Ashby: you're one if you can open the Admin tab. Ashby doesn't show who the admins are, so ask your IT team if you can't.
- Colare and Ashby open side by side, since you'll copy two keys between them.
1Connect Colare and Ashby
Setup starts in Colare's Settings and finishes in Ashby's Admin area. You'll move two keys: Colare's key into Ashby, and an Ashby key back into Colare. Done once, by an Ashby Organizational Admin.
Open the integrations settings
In the Colare platform, go to Settings → Integrations. The Ashby card sits under Applicant Tracking Systems, alongside Greenhouse.
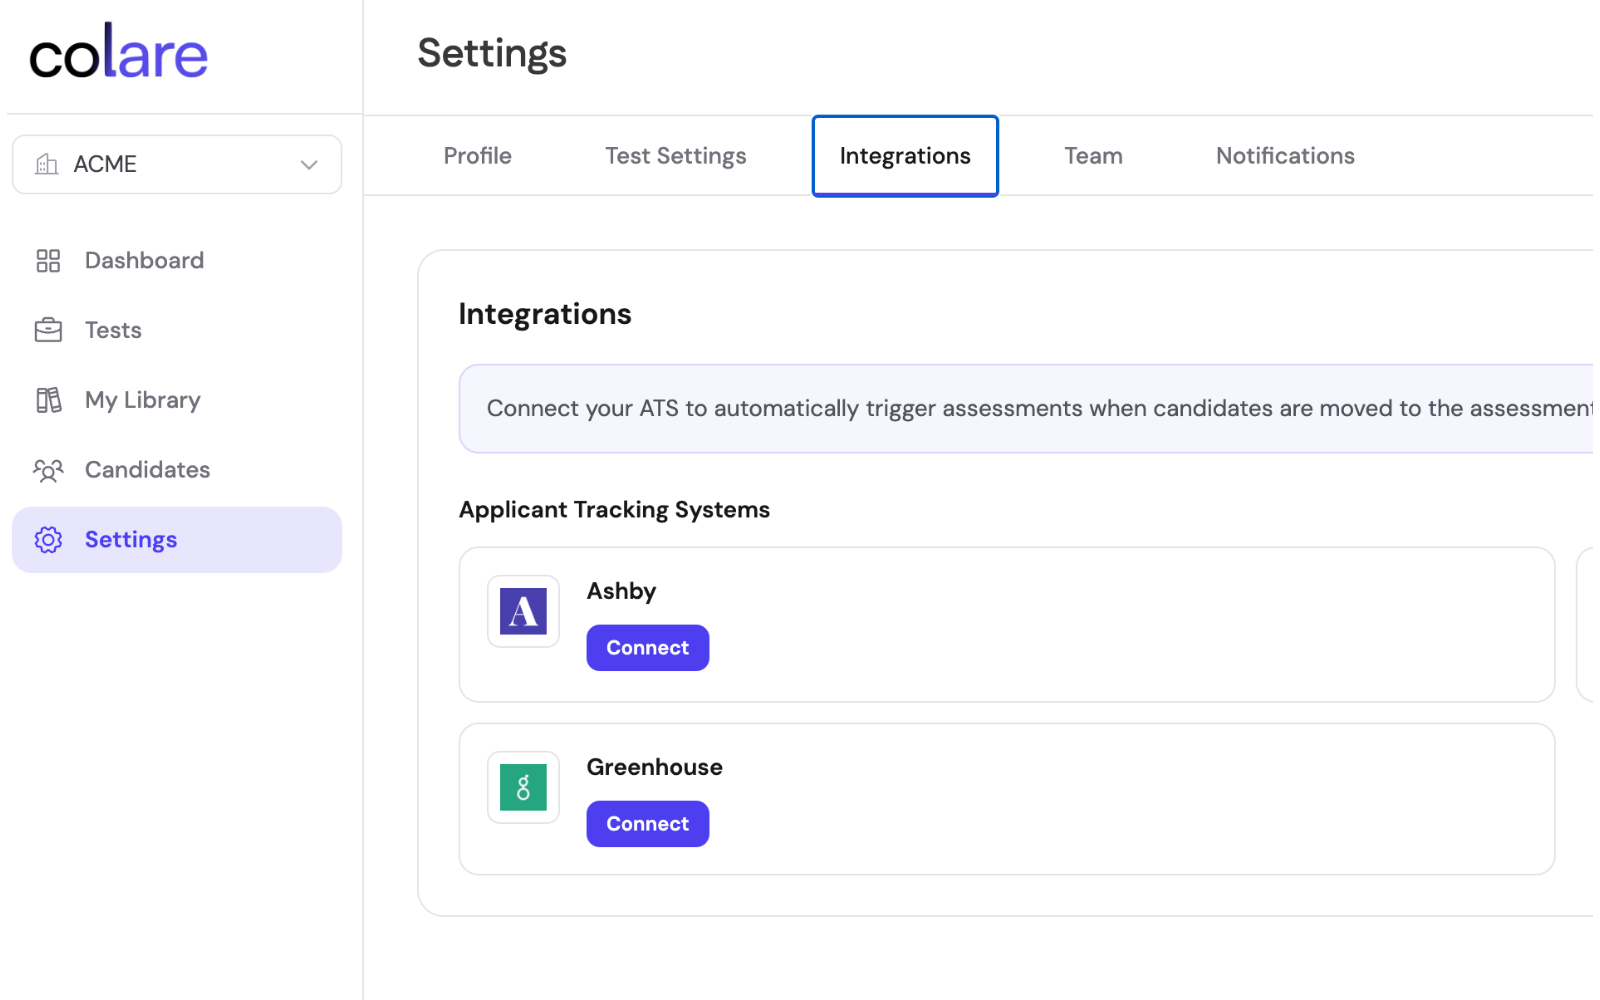
Click Connect on the Ashby card
The card switches to Connecting… and a connection window opens over the page.
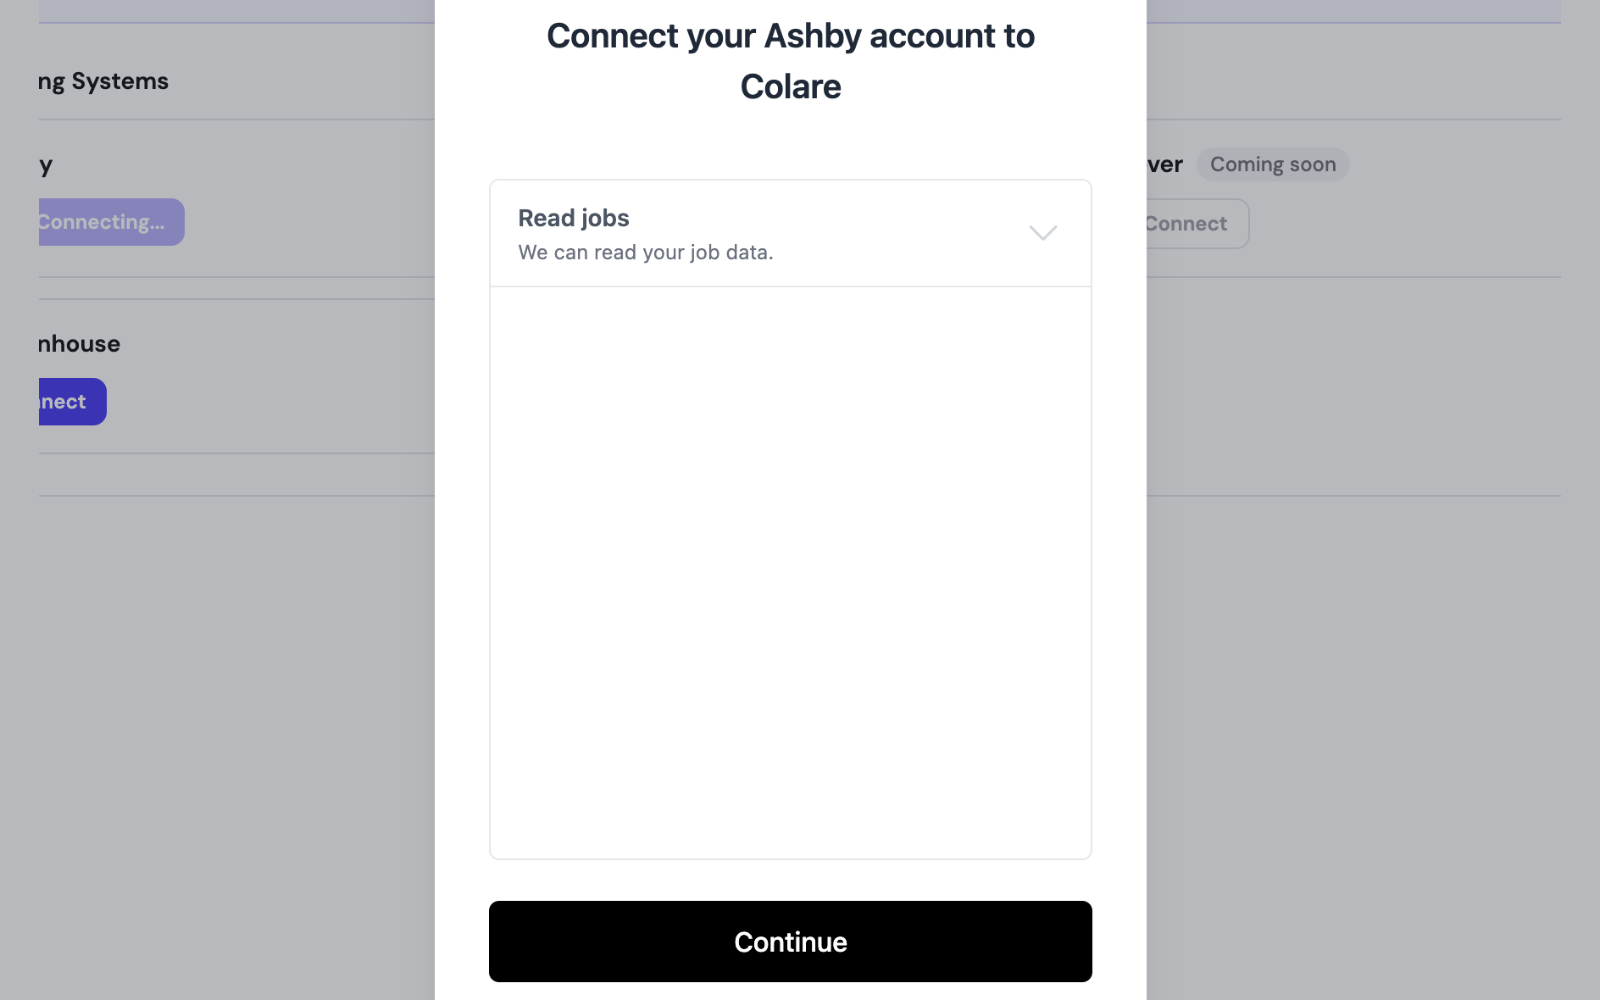
Review the access Colare is requesting, then click Continue
The window lists what Colare will read from Ashby, for example Read jobs: “We can read your job data.” Read it, then click Continue.
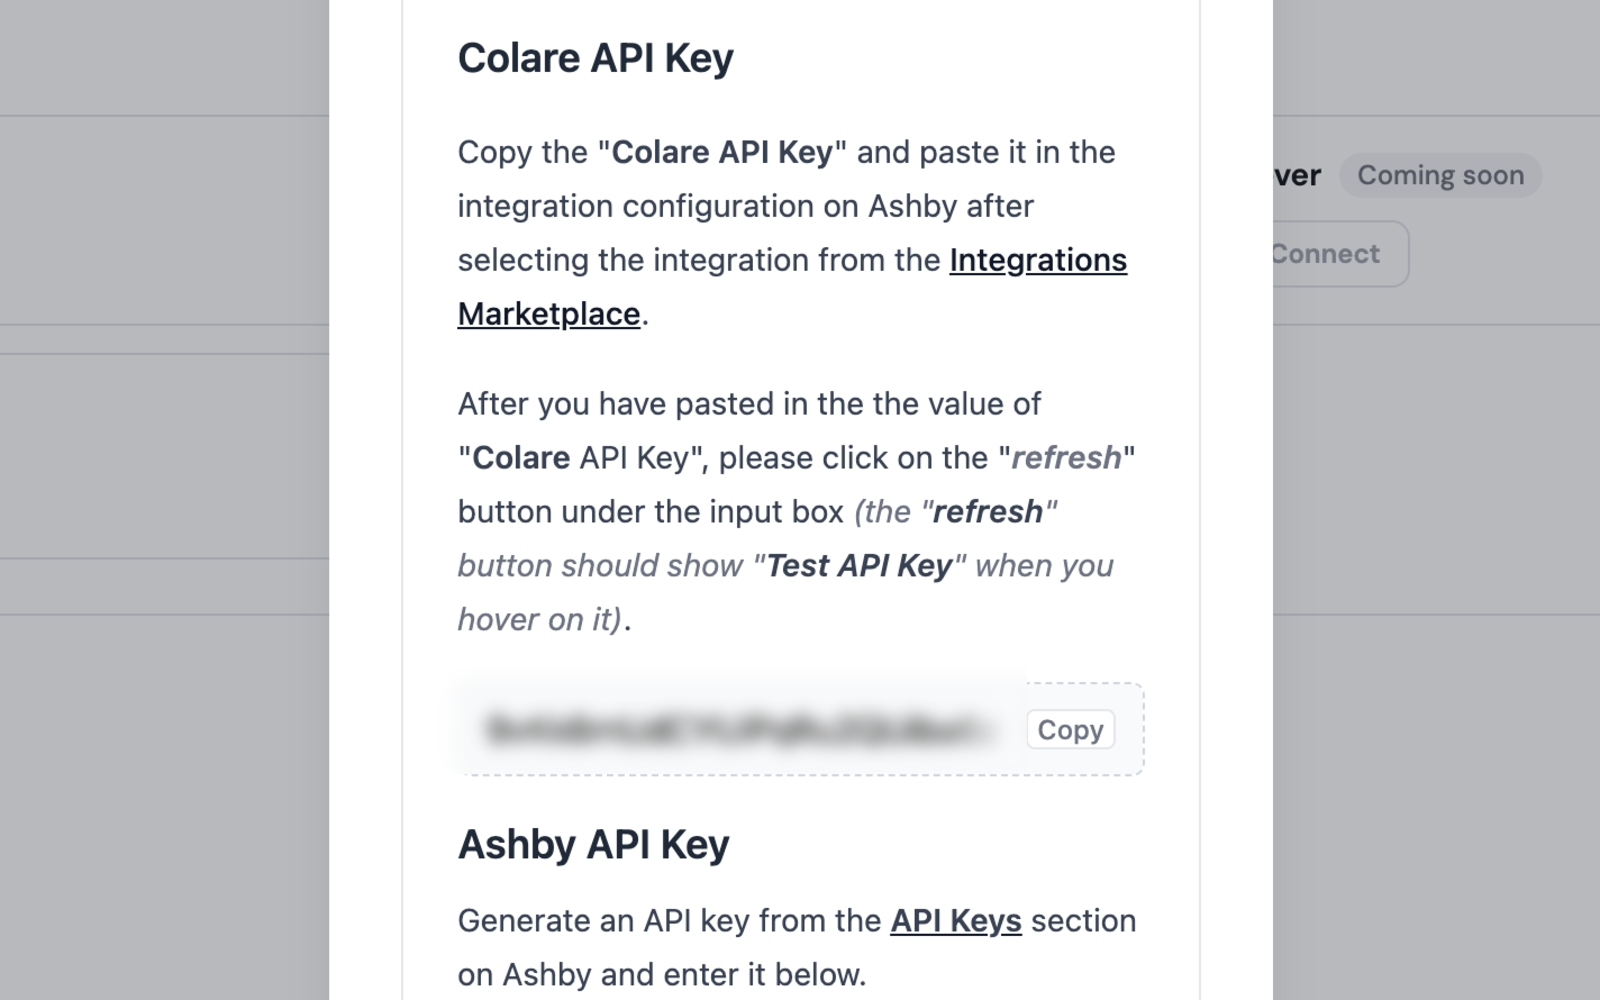
Copy the Colare API key
The window now shows two keys: a Colare API Key to add to Ashby, and an empty Ashby API Key field to fill in later. Click Copy next to the Colare API Key, and leave this window open.
Open Colare in Ashby's Integrations Marketplace
In Ashby, go to Admin → Integrations → Marketplace and select Colare. The Integrations Marketplace link in the Colare window takes you straight there.
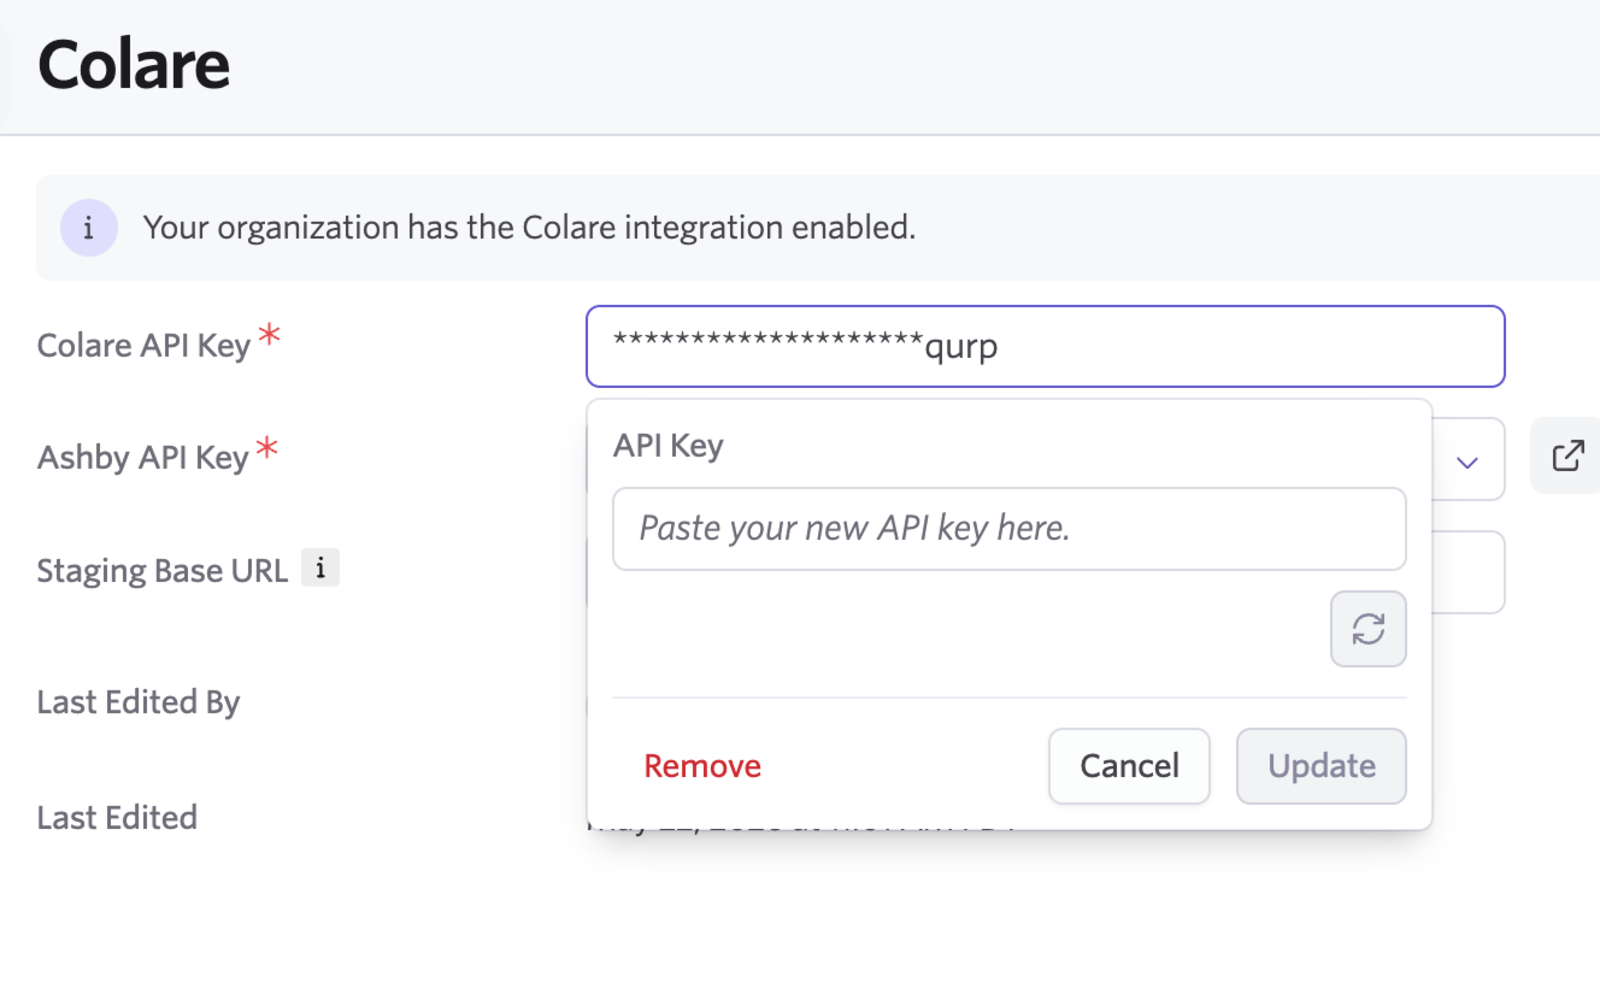
Paste the key, test it, and save
Paste the Colare API Key into the integration configuration. Click the refresh button under the input box to check the key works (it reads Test API Key when you hover over it), then click Update to save.
Create an Ashby API key for Colare
In Ashby, open Admin → API Keys (also linked from the Colare window) and create a new key with a name you'll recognise later, for example “Colare assessment integration”.
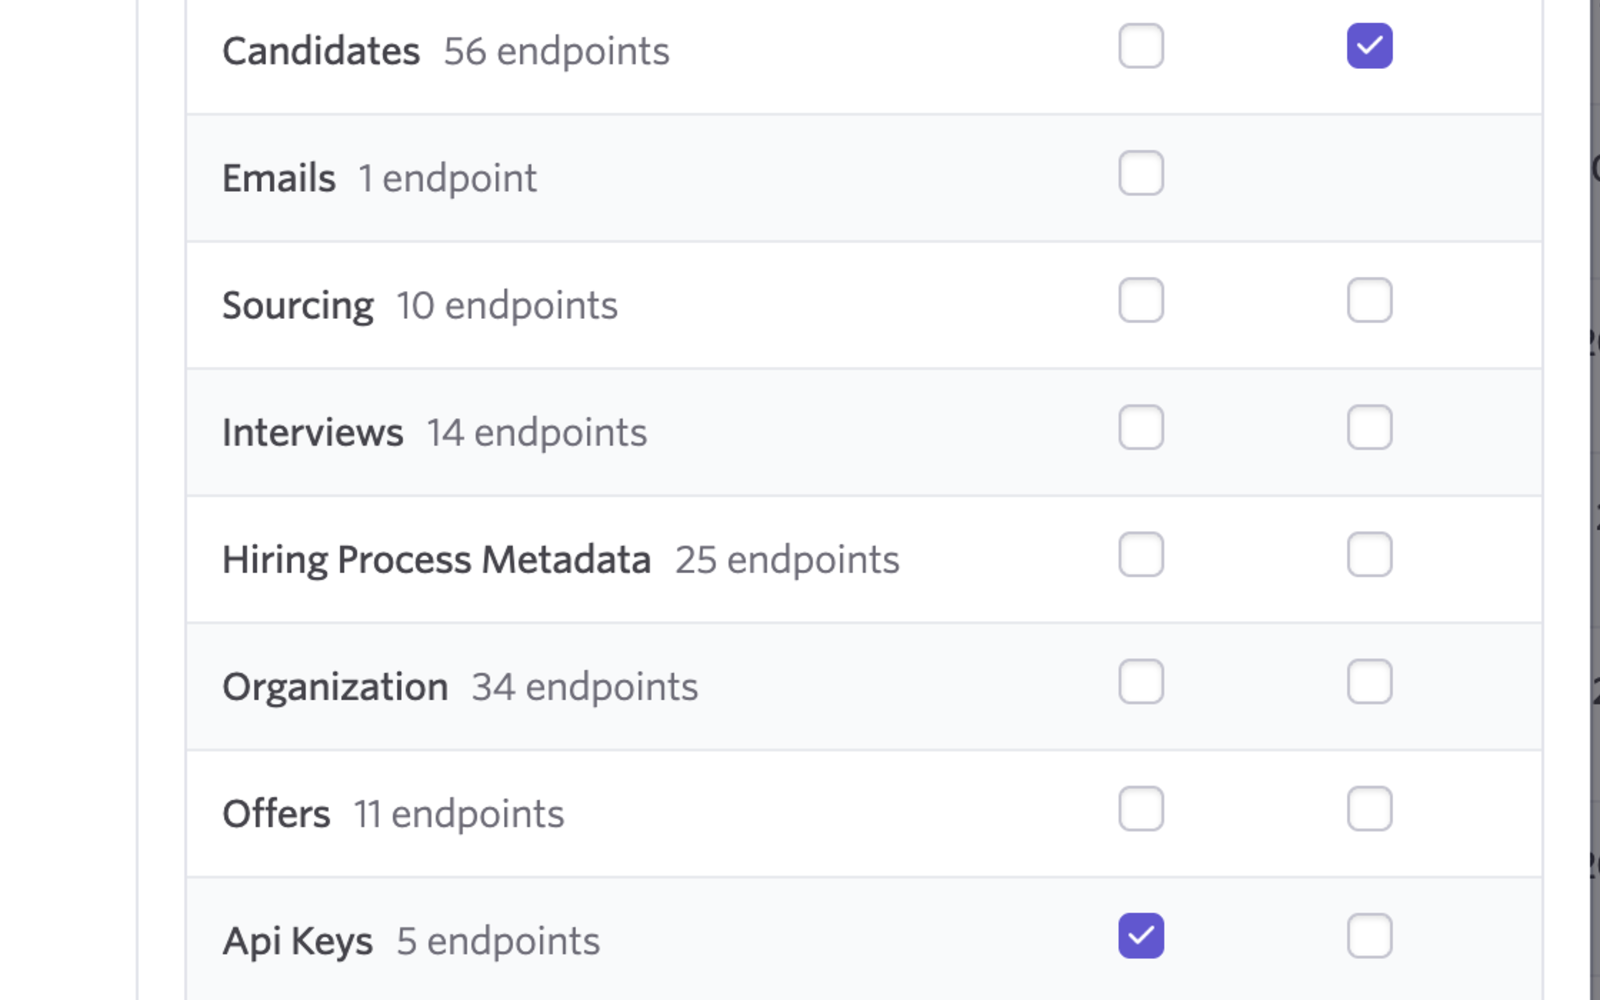
Turn on two permissions
The key needs Api Keys → Read and Candidates → Write.
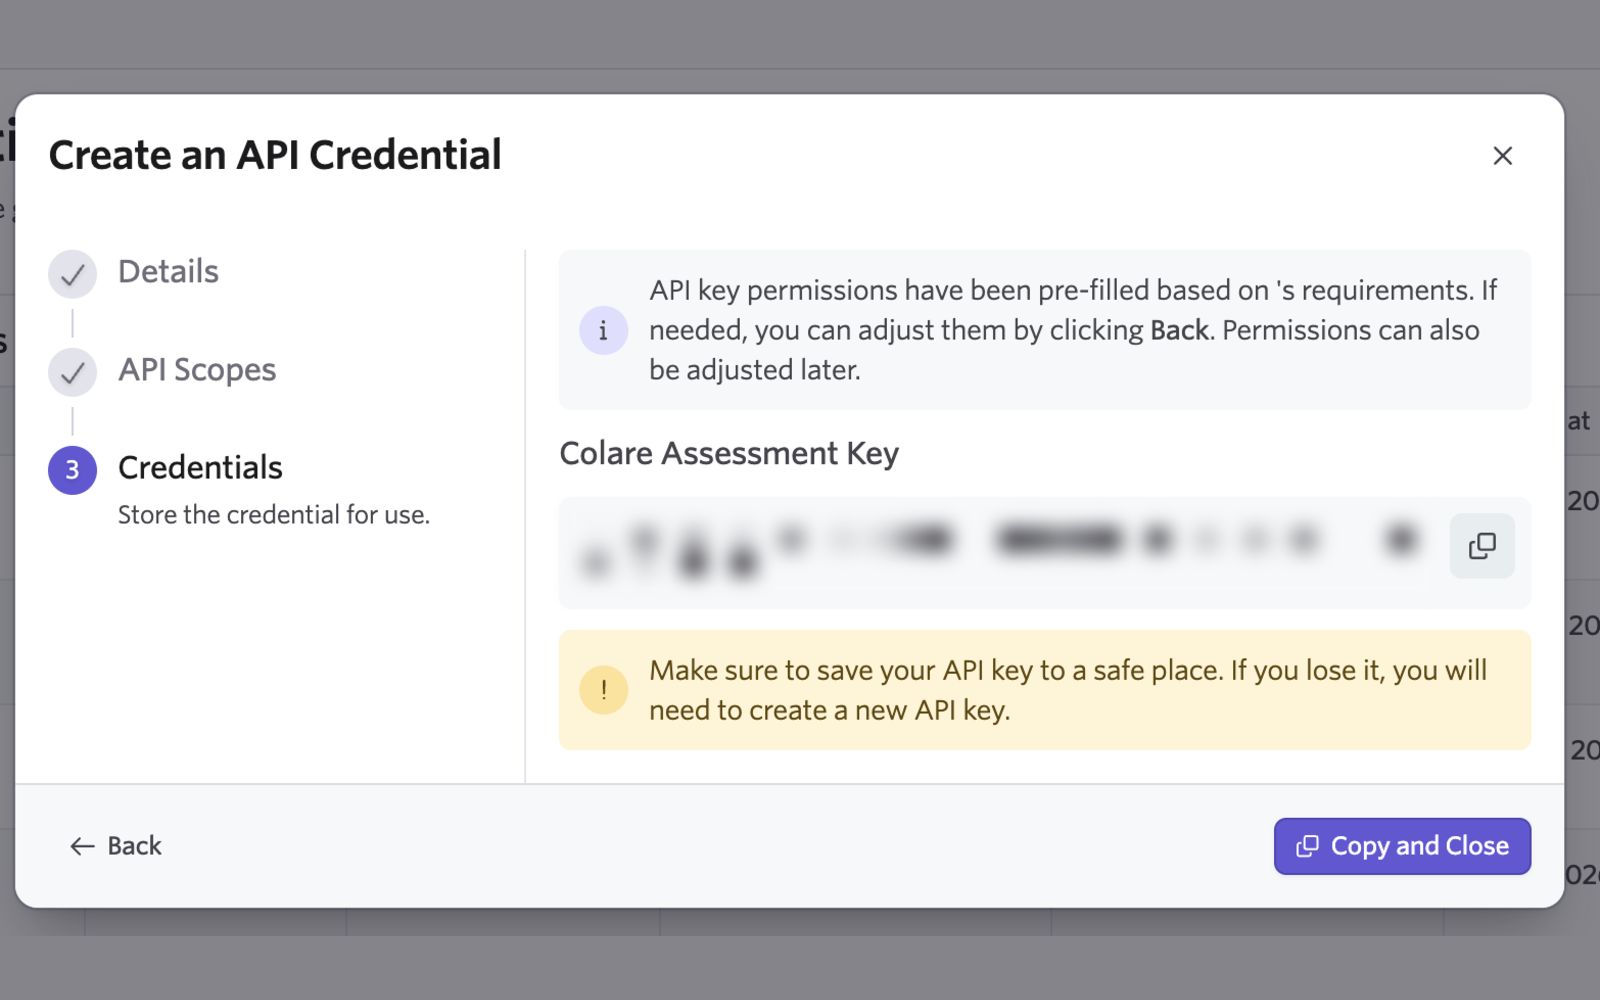
Paste the Ashby key into Colare and finish
Copy the key, since Ashby shows it only once. Then paste it into the Ashby API Key field back in the Colare connection window and click Set up integration. That completes Phase 1.
2Add Colare to a job
Repeat this phase for every job that should use the assessment. It is not a one-time setup. That includes jobs that are already open and running: adding the activity to a live job is fine, and candidates already in the pipeline can be moved into the stage afterwards.
Open the job's interview plan
Open the job from Jobs, go to Interview Plan, and find the stage where the assessment belongs.
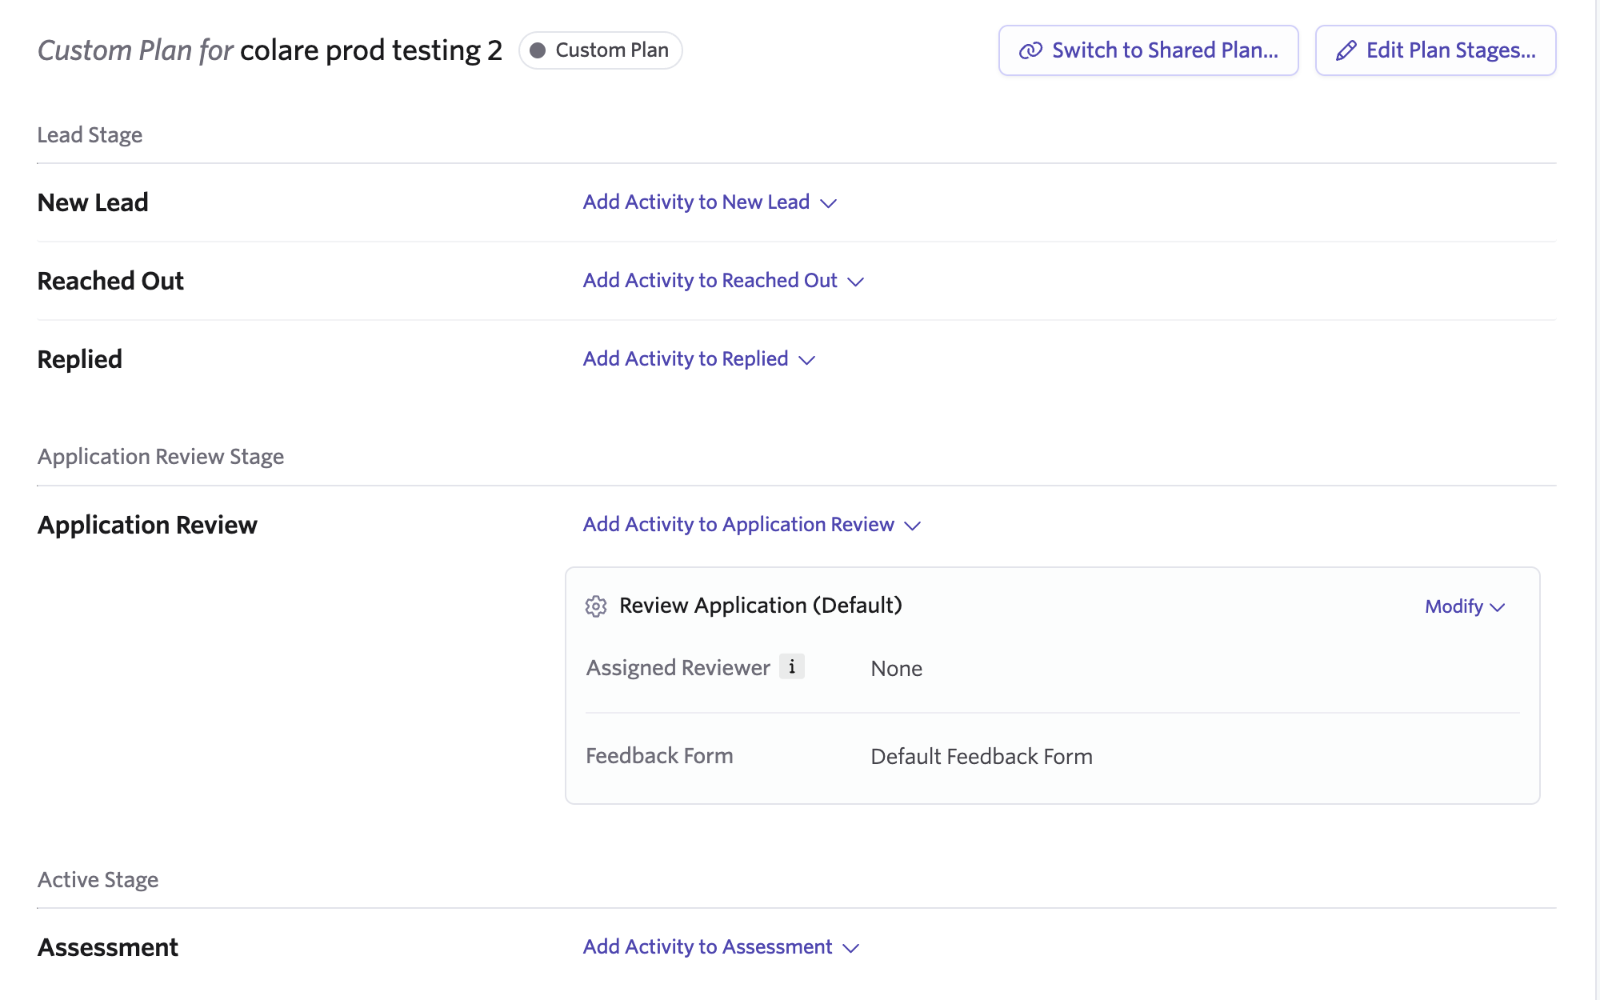
Add Colare as an activity on that stage
Click Add Activity to… → Add Activity, choose Colare under Integrations, select the assessment, and click Add.
Invite candidates automatically (optional)
Open the Automation tab on the activity and turn on Automate on Stage Entry. Every candidate who enters the stage is then invited without anyone sending the assessment by hand.
3Send assessments and read scores
The day-to-day loop. Everything here happens inside Ashby. There's no need to open Colare to send an assessment or read a result.
Send the assessment
Automatically: move the candidate into the assessment stage. With Automate on Stage Entry turned on, the invitation goes out on its own.
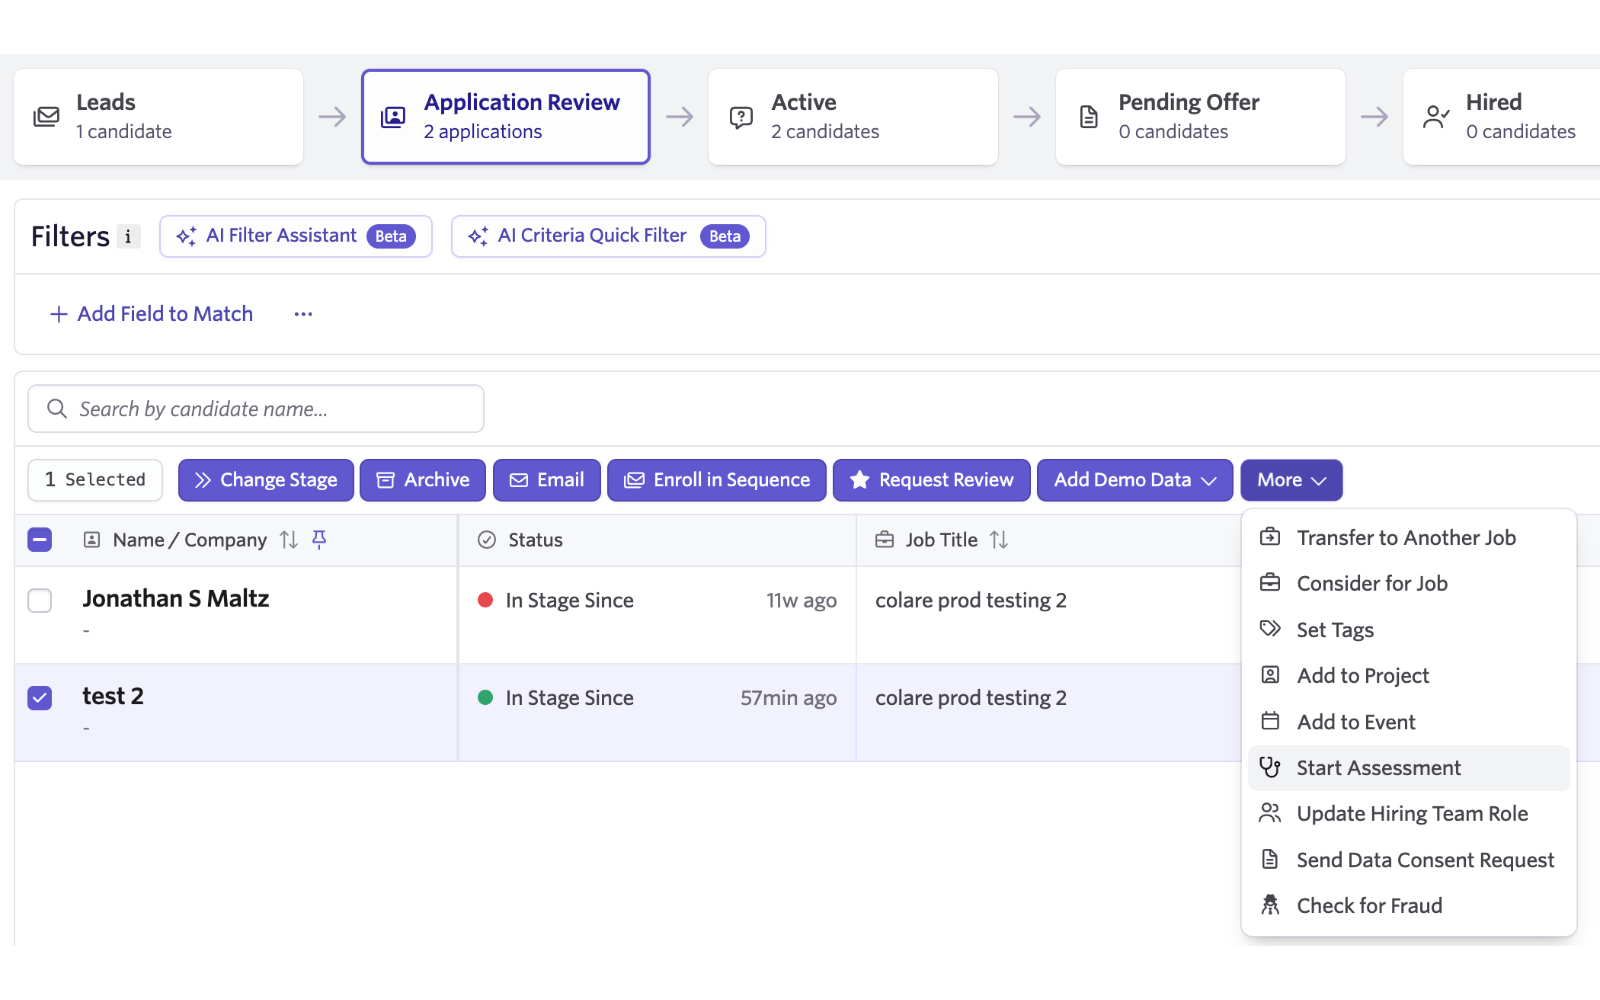
Manually: open the candidate, then New Activity → Assessment → Colare, select the assessment, click Add Activity, then Start Assessment and Start.
Read the result without leaving Ashby
Once the candidate finishes, the score appears under the activity on their page, with a link through to the full Colare report.
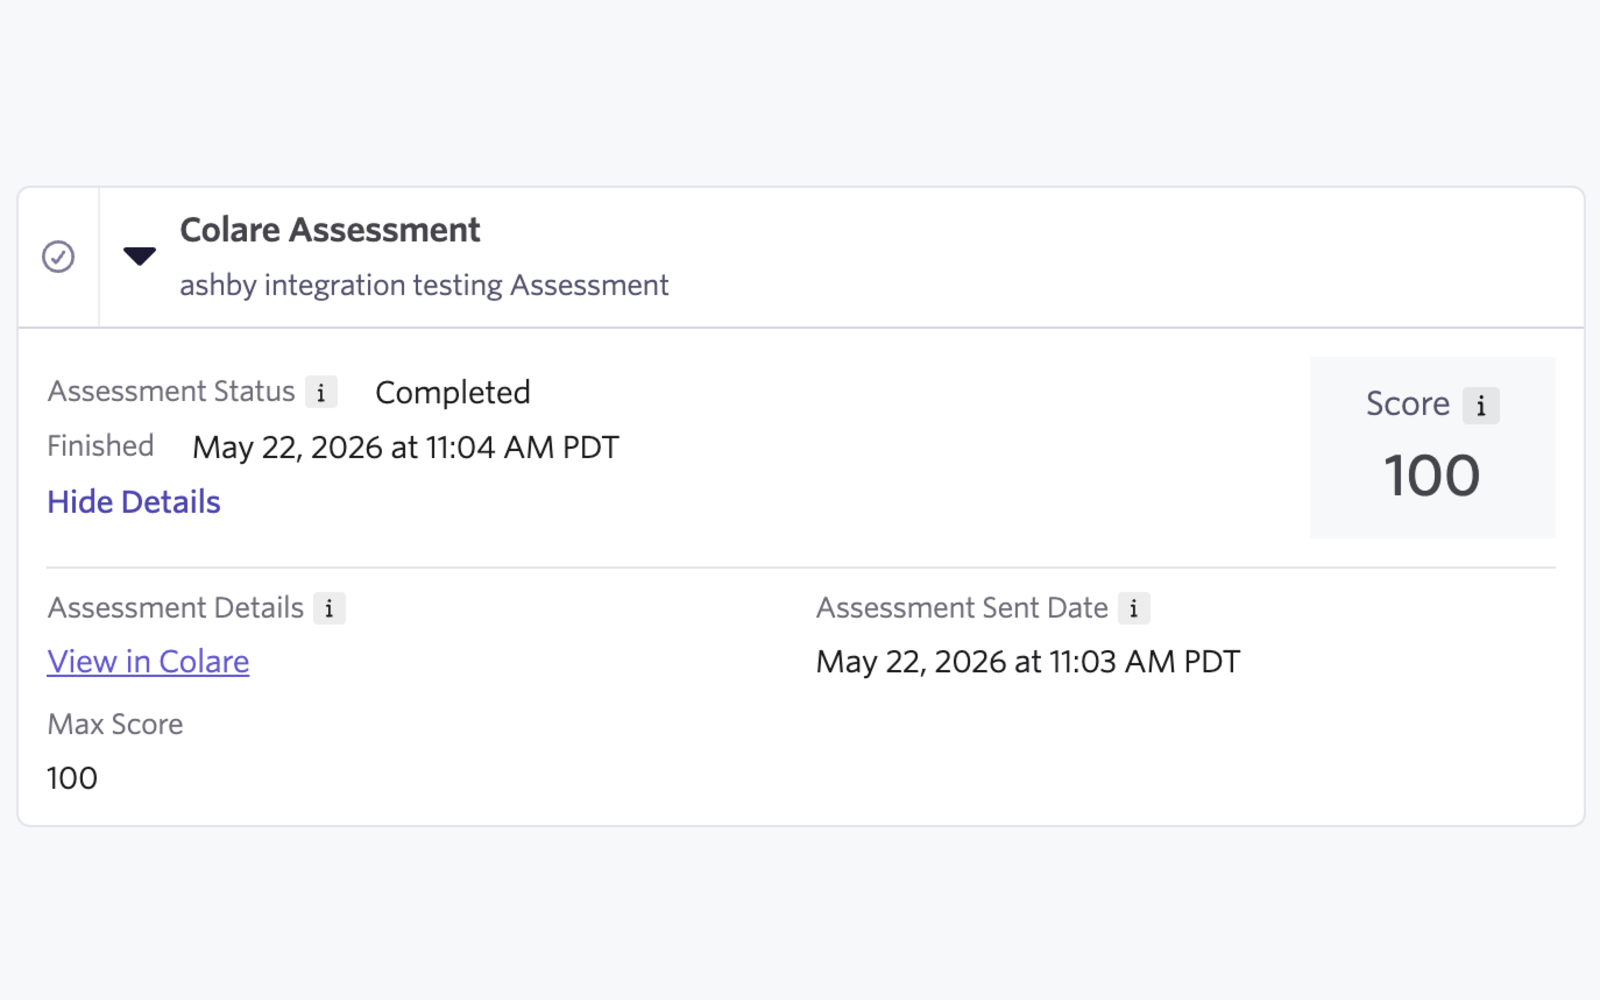
Filter the pipeline by score
Open the job's Candidate Pipeline, turn on Advanced, click Add Field to Match, and search for “Colare assessment score”.
Keeping the connection working
The connection keeps working as long as both keys stay valid. If either key is deleted or changed, in Ashby or in Colare, the integration has to be set up again from step 1.
While setup or a reconnection is in progress, your team can keep sending assessments directly from Colare.
Questions that come up
Why does setup need an Organizational Admin?
Ashby only lets admins manage integrations and API keys, so both halves of Phase 1 are out of reach for other roles.
Can a whole stage be invited at once?
Yes. Turn on Automate on Stage Entry, then move the candidates into the stage.
Does it work for jobs that are already open?
Yes. Add the activity to the live job's interview plan and move candidates in as usual.
What if Colare doesn't appear in the activity list?
Check that Phase 1 finished on both sides, then email support@colare.com.
Phase 1 is done once. After that, the only recurring work is adding Colare to each new job and sending the assessment for each candidate. Both happen entirely inside Ashby.
If a step doesn't match what you're seeing on screen, check with your Colare contact before working around it.